
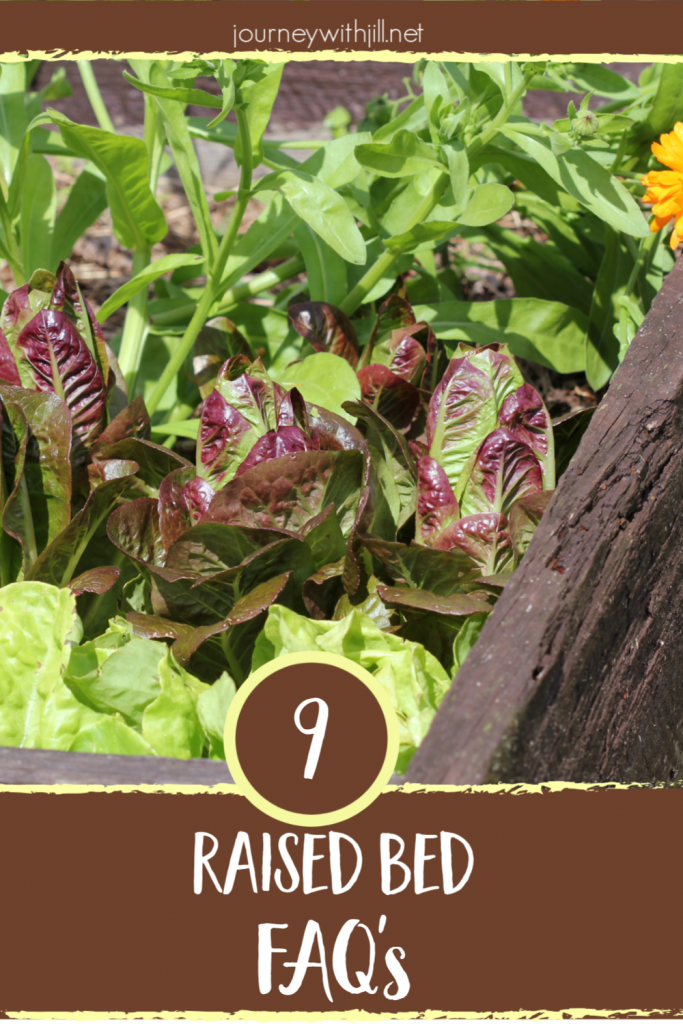
Raised Bed Garden FAQs: 9 Common Questions
About a year ago, I wrote a post about 7 Common Mistakes in Raised Bed Gardening. It has since become one of the most popular posts here at the Beginner’s Garden, and many readers have posted more questions about their raised bed gardens.
So I thought I would visit this topic again and answer some of those questions. In this episode of the Beginner’s Garden Podcast and in the post below, I dive into nine of the most common questions I hear. Click below to listen to the full discussion or continue reading.
*this post contains affiliate links, which means if you click through and make a purchase, I will receive compensation at no extra cost to you.
1. How deep does the raised bed need to be?
The height of your raised beds will depend on your personal preference and needs. Most people choose beds between 6″ and 24″ deep. But that’s a big range, right? How do you know how deep your raised bed should be?
I talked about the height of raised beds a bit in this post about soil in the raised bed. Most of my raised beds are either 8″ or 10″ deep. They are either built with one board that is 10″ wide or with 2 boards that are each 4″ wide. If you have deeper beds, remember that you will have to fill that depth with soil and that can be difficult and expensive.

You do want them to be at least 6″ deep. This will depend on what you are planting and if your beds are directly on top of soil or something else like concrete. If your beds are on top of soil, you can more easily get away with shallower beds because the roots will grow deeper into the soil below.
Some gardeners have 18″ tall beds or even taller due to the ease of working in the garden itself. If you choose to have taller beds like this, you’ll want to make sure that the boards are braced well and can support the weight of your soil.
2. Do I need anything at the bottom of my bed?
There are two reasons why you might ask this question. First, you want to avoid weeds from growing up and into your garden. Second, you may be worried about ground animals that might come up from under your raised beds and eat your plants.
For weed control, most of your weeds will not grow up through your raised bed soil to the top of your garden. Weed seeds need light to sprout and, for the most part, won’t be so aggressive to grow through deep soil. Most of the weeds that you’ll have to deal with will come from the wind or birds dropping them down. They may also come from the soil itself, especially if it’s native soil and you don’t use a thick layer of mulch to block their access to light.
One common suggestion is to line the bottom of the garden with cardboard. This will not only keep out the pernicious weeds, but will benefit your garden by keeping your soil from seeping out and keeping it moist. This environment also encourages beneficial earthworms. When the cardboard starts to break down, it adds nutrients to your soil.
I would caution you against using landscape fabric. It will not break down like cardboard so it will not benefit your soil. And while it is permeable when it is new, the smaller particles in your soil can clog the holes and cause drainage problems for your bed.
To protect your garden from pests, you can line your bed with hardware cloth or chicken wire. This would keep the moles, voles, ground squirrels and other pests from being able to burrow into your raised beds.
3. Is it safe to plant vegetables in cinder blocks?
Modern cinder blocks no longer contain cinder; instead they contain fly ash, which is a by product of coal. The gardening and environmental world has not been able to come to a firm opinion on whether or not these blocks leach chemicals, though the biggest risk seems to come if they are chipped or broken. If you are concerned, you could use a plastic lining in your bed. Or you could save the holes of your concrete blocks for non edible plants, like marigolds or other flowers that will attract beneficial insects.
4. Can you explain the best way to use mulch in my raised bed garden? When should I add it?
Since we more often think about mulch in our ground beds, this is an excellent question for raised beds. I wrote about mulch in this post that will be helpful for you.
I add my wood chip mulch when my plants are about 6″ tall. You will want a layer of at least 2″ of mulch to adequately cover your soil and prevent weeds from growing.
5. Will raised beds really help with drainage if the soil you’re putting them on doesn’t drain well?
From my personal experience, yes they do. My soil has a lot of clay so it does not drain well, but my raised beds thrive even when the ground beneath them is saturated. In fact, one of the best ways to grow a garden if you have poorly-draining soil is to build raised beds.
6. I have an old deck. Can I make raised beds out of old decking?
It depends on when the wood was manufactured. I constructed a raised bed out of an old fence, and you can see my process here.
Most decking and fencing are made from pressure-treated wood, and here’s the deal with pressure-treated wood. If it was manufactured prior to 2003, it was treated with CCA, Chromated Copper Arsenate. The concern is that arsenic could leach into your plants. I wouldn’t take the risk unless I covered them in food grade plastic, but that’s a personal decision.
Personally, I don’t have a problem with using post-2003 pressure-treated wood in my raised beds. But again, that’s a personal decision.
7. What should I do to get rid of weeds around or outside of my raised bed garden? Is it ok to kill them by spraying a weed killer?
No, you do not want weed-killing chemicals in your soil or anywhere around our plants. The risk is great not only for your food but for the environment as we cannot control where those chemicals go.
If you have a few weeds around your bed, you could spot treat with a vinegar mixture. Just be sure that the vinegar doesn’t get anywhere on your plants. Personally, I would take a broader approach.
There are several options for taking care of weeds around your raised beds. One option is that you could lay down cardboard or rolls of butcher paper. On top of that barrier, place some sort of mulch on top. Pine needles are an excellent choice for this, as they do not break down as quickly as other kinds of natural mulch.
I’ve also let the grass grow up to my beds and mowed as needed. It looks nice and there are many beneficial insects that live in grassy areas, like ground beetles and ground-nesting bees, that could be attracted to your garden.
8. How long can one use the dirt in the raised bed? Do you recommend replacement or a partial refreshing?
Yes, raised bed soil definitely needs to be refreshed, but a complete replacement isn’t necessary. In my own garden, I have a long growing season and I plant several different crops in each bed and they deplete nutrients from the soil.
I recommend adding a layer of compost 2-4″ deep on top of your soil. Earthworms will help to mix it in naturally over time. It may be better to do this in the fall, though spring is fine, too. I would add the layer of compost, plant your crops right there, and then add your mulch on top.
9. What is the best soil mixture?
I discussed this in detail in this post about soil for raised beds. While there are many options, you’ll want a mixture of topsoil, compost, and organic material. There’s not necessarily a strict recipe; it often depends on what you have available.
Make sure you check out my free guide, Raised Bed Soil Options for Any Budget. I’ve laid out 3 levels of options depending on your budget that can help you decide how to choose the best soil option for your garden.
–
What about you? What questions and/or experiences have you had in your raised bed garden?
Do you get overwhelmed with garden planning?

Subscribe here for my best tips to plan your garden in just 7 days -- all for FREE.
Plus, I'll send you my "In the Garden E-mail" on Fridays, periodic updates on garden resources relevant to you, and you'll receive access to my entire bank of free garden downloads!
You are also agreeing to our privacy policy.
I created a new raised garden using cardboard base to cover the grass. I forgot to cut the cardboard (x) when placing the plants. I have newspaper and mulch on top of the triplemix. Will the roots make it thru safely for winter? If not, is there an easy way to fix?
If you’re talking about cardboard like a cardboard box, it will break down in your soil slowly over the season with plenty of rain or irrigation. Unless your raised bed is very shallow, and/or the plants you’re talking about need to grow long taproots, I wouldn’t be concerned.
Wondering about green manure for my raised beds. I use a green manure, (clover) for my beds. In the fall that grows all through the fall and winter months. I till this up in the spring. How do you feel about green manures for beds?
I think it’s a great idea and it’s one I have been experimenting with myself. I personally use buckwheat in this way, and I cut it down after the flowers fade, with my Rogue Hoe. You might start with winter-killed cover crops so you don’t have to worry about killing them yourself since you won’t be tilling your raised beds. I’m sure winter-hardy ones would work, too, but would require more labor in incorporating them back into the soil in the spring.
Hi. I am just starting to look into raised garden beds. Now, when I state a raised garden bed, I mean the bed is about 3 feet off the ground. I recently saw one of the beds made out of plastic and on line. I was thinking of going this route. I want to do it this way as I have a problem with my back and getting up and down.
Ok, so here is my questions:
1. The raised beds I am looking at are made out of plastic with built-in drainage and what looks like fine mesh on the bottom. Would the soil, mulch and the rest work as well in this environment as it does for those beds made on the ground?
2. I am thinking of a small bed of lettuce, tomatoes, string beans and maybe cucumbers.
I should mention that the beds are about 3.5 feet across and about 8 feet long.
Do you foresee any problems here?
I think your ideas are good ones. The only thing you’ll need to adjust is that your raised bed will likely act more like a container than a bed on soil because the roots won’t have contact with the soil below. Nutrients will leach out with rain, so you’ll need to add more organic materials and organic fertilizers. And you will need to water more frequently. Also, keep in mind that the soil will heat up quicker. This will work to your advantage in the spring but will be more of a challenge in the summer and early fall. I do think you could fit the crops you want to grow in this space, depending on how many you choose. I recommend utilizing vertical gardening for the cucumbers and possibly beans (pole beans) to get the most out of the space. Tomatoes will also need support.
We have just built a raised bed that has a clay bottom. We tried tomatoes twice this summer and they just yellowed and did not thrive. We dug 12” holes for each tomato, adding worm castings, manure, and garden soil. The garden will not dry out. Since this was just the first year attempt, we are planning to til, straw, and ???? this fall, hoping to get the soil to drain better. Oh, and we also added peat moss this summer. We also plan to get the soil tested before next spring. Any suggestions that we haven’t thought of? Oh, and we plan to add leaf mulch for winter.
I think all of your plans are great ones for drainage. Perlite is also an excellent choice for drainage, and I would add that to the bed. I am curious to know — are you saying your native soil is clay or that there is a hard, impervious clay bottom like a container? I’m thinking you’re meaning the former. I would also be curious to know what kind of soil you put in your raised bed to begin with, and how tall it is. Depending on where you live, this year may have been a wetter than average year (ours was), so unless that trend continues you may find your conditions improving anyway next season.
I have so many questions! Lol I have a really bad back, in fact, I can no longer work…I’ve tried the last few years to grow in pots on my deck but I got very few veggies. So, this year (we JUST had a last frost a week ago…my son is going to put together a raised bed for me this weekend. Ive never done it but am so excited. Ive read a lot but I got so much info from your site so I wanted to ask for help.
The plans for the bed is U shaped, 3′ wide, outside to be 12′ long & about 7.5″ deep. So the inside will be 9′ long) My soil, (why I havent tried an inground garden in many years) is very bad, hard, lots of clay and rocky in areas.
1. Do I put cardboard (Been saving boxes all winter) on the bottom, then soil?, then mulch on top AFTER plants are 6″ tall?
1a. You say wood chips are preferred & after reading your pros/cons article, I would agree. But i’ve only ever seen those big chunks of chips? Are those what you mean?
2. I’m confused about what to add to the soil? I’ve read like peat moss, vermiculite, etc?
3. I have never started a compost but would like too. I’ll have to find how to do that unless you have an article on that? But I’m confused about WHEN you use the compost mixture? And is there something I can use in place of that since I do not have compost started?
4. ANY, LITERALLY ANNY, advice would be extremely helpful & very much appreciated.
Being disabled now & not having great luck in the past has been frustrating. I just want to do it right. I’m on a fixed income now so I want to avoid as many mess-ups as possible. I desperately want some good, organic, chemical free veggies this year!
Lastly, how on earth do I figure out what goes where? That’s a big question, I know & probably unanswerable. But, just as a run down, I WANT, to grow, lettuce, tomatoes, cucs, Onions, Bell Peppers Jalapenos, Zucchini & hopefully, try out some carrots & leeks, possibly a celery, just to see. It’s just me, I live alone. I won’t be planting tons and tons. I am going to try my herbs again either inside or containers.
Thank you for your time & again, any advice would be helpful. I dont expect you to answer all those. Lol but hopefully some?
Thank-you so much for the free info you offer. I’ve already signed up for them! FYI-I live in East TN.
Hi Melissa, congratulations on your first garden! I’ll answer your questions one by one:
1. Yes, that’s a perfect plan.
1a. Yes, wood chips are pretty large in comparison to your soil. Never mix them into the soil.
2. Check out this post for more details on soil mixes and be sure and download my raised bed soil guide: https://journeywithjill.net/gardening/2020/03/09/3-raised-bed-soil-mixes-compared/
3. Here’s an article/podcast on compost. I add mine at the beginning of the spring season and the beginning of the fall season. I also have to add bulk compost, which you can purchase in the meantime: https://journeywithjill.net/gardening/2017/02/14/composting-for-the-beginner/
As far as what to plant where, divide your crops into cool weather and warm weather (some of what you listed you’ll want to wait til fall). Then, look up the mature size of each crop to find out what needs to go where. In general, plant taller crops on the north or east side and shorter crops on the south or west side.
Thank you so much!!! I cannot believe you could answer all my questions ! I thought they were impossible. Cant wait! Thank you for all your help!
Hi, Jill
Still have a couple of clarifying questions. My soil problems are: heavy clay soil, fire ants, and trumpet vines. I was thinking of landscape fabric (till I read your advice in question #2) to block the vines. They originate from a city creek about 150 feet from my property and are infesting my yard and my neighbors’. I have tried pulling them up until I realized how DEEP those roots are, so now I am digging down a bit, snipping off as far as I can and applying a dab of stump killer. Pretty laughable results but I don’t want to use chemicals willy-nilly (#7) and organic methods (vinegar and citrus oils) have not made a dent. Hence the consideration of landscape fabric… Any ideas?
Also I was thinking if I lined the beds with cloth and put a line of petroleum jelly on the outside of the raised beds maybe fire ants would be deterred? I tried organic (club soda, cinnamon, peppermint) – they just moved the nests!
I am a new first time gardener and am determined to not give up. Thanks for any suggestions
I don’t have any experience with trumpet vines, but my Bermuda grass seems just as invasive. From what I’ve read online, trumpet vines are about impossible to get rid of without herbicide. Although I don’t recommend landscape fabric in general, it might be worth trying to keep them from your raised bed. As far as fire ants go, I fight them too. I pour a kettle of boiling water in the mound and sometimes it works; sometimes it doesn’t. Joe Lamp’l has a good podcast episode and blog post that talks about fire ants in the garden that might be of help: https://joegardener.com/podcast/fire-ant-control/
I am getting ready to build my first raised vegetable garden. I want to start small so I’m thinking of just making a 4 X 4 for the first season. Unfortunately, any place I put it will be sprayed by our sprinkler system. I’m worried that it will get over watered and drown out the plants. We water our lawn twice a week for 20 minutes. Will that be too much water or would I need to hand water between?
Also, in Texas it gets very hot in the summer. The place I have planned will get full sun all day. Is that good or bad?
I definitely don’t think that would be too much. It might not be enough in the heat of the summer, but there are ways you can keep an eye on that and make adjustments. This article / podcast episode should help: https://journeywithjill.net/gardening/2019/07/09/garden-irrigation-best-practices-with-joe-lampl/
I’m planning my very first raised bed. We have a lawn in our backyard and I’m planing to put down cardboard over the lawn and then the raised with, which will be filled with soil. Does this sound ok? From all my reading and browsing it seems like this is the best way to go. Will the lawn grass grow through and up into the raised bed?
Yes, I would highly recommend this! Once the cardboard breaks down, it’s possible that invasive grasses (like bermuda) can still penetrate, but in my experience, it’s not as likely. I have bermuda penetrating much of my garden space, and it rarely affects my raised beds (and I didn’t line my beds at all).
The only place in my small back yard that gets enough sun for vegtables is a narrow strip that happens to be over buried power lines. Can I use a raised bed obver buried power lines?
I am not sure about that. You probably should contact your local utility company and ask them before you put a raised bed on top of the lines.
Hi, this might be a dumb question, but can I build a raised bed around plants I already planted a year ago? Blackberries and strawberries. They’re doing great, and I don’t really want to dig them up.
You might be able to get away with building up the soil with blackberries, on a small level, but I’m not sure how that would work with strawberries. They are so low to the ground as they are. If they are doing well in the ground they’re in, I’m not sure what benefit a raised bed would provide?
First, THANK YOU so much for giving specifics on mulching! I always read the advice to much my garden, but the seeds are planted at 1/8″ depth and so obviously 2″ of much would render them too deeply buried, and then I don’t know what to do! So thank you for specifying! I hope you can help me with some other issues:
I planted an early spring garden (lettuce, beets, radishes, spinach, and a few carrots I didn’t really expect much from) in a new waist-high container-type raised bed this year. I used a combination of some old Mel’s mix from a previous attempt that had been sitting out for a couple years and had a lot of weeds in it that I tried to sift out as well as possible and bagged compost. AFTER planting, I discovered my outdoor cat had been using the old Mel’s mix as a potty, though I know she did not do it there exclusively. I never saw evidence of it as I sifted and stirred (and I did a lot of that) so decided to just pretend it didn’t happen and hope for the best. Then yesterday I found my beets and radishes dug up where she had pottied in the new bed (despite my mini-fence of forks and wire; she’s quite the leaper!)
1) Is my whole bed (1 1/2′ x 3 1/2′) toast or is it safe to eat the lettuce? I doubt the root veggies will recover, and I’m not sure I really want to eat litter box beets anyway, but the lettuce looks great.
2) Can I safely scoop a large section out around the “evidence” I found and replace it with fresh soil for new planting?
3) Any suggestions (that don’t require building a fence) for keeping a cat out of the nice, soft, diggable soil??
4) We are in the process of building a cinder block raised bed that will be about 30″ high. We layered cardboard, hardware cloth (meant to do it in the other order, but forgot), old firewood, large wood chips, small wood chips and twigs, dried grass clippings, and fresh grass clippings. The plan was to finish off the rest of the old Mel’s mix and a bunch of old potting soil from previous years and dead plants we have sitting around, and then top with a mixture of bulk top soil and bulk compost. The idea for wood layers came from an article I read on someone’s experiment combining hugelkulture and raised beds and seemed like a great way to fill space under the soil and save money and we would still have around 12″ of soil on top of it. After reading your articles I am wondering:
A) Is it safe to use the rest of that old Mel’s mix?
B) Is it worth using the old potting soil from plants and old bags I never used? and
C) How will I keep the cat out of this one if she got in the taller one??
Thanks for any help you can give. I really appreciate your approach to helping gardeners who are just trying to figure it out!
I’m not certain enough on the cat question to be able to answer with enough confidence. I’d recommend contacting your local county’s cooperative extension office on the safety (or lack) of using soil that your cat has used. To keep the cat out, you might consider laying a cattle panel trellis on top of the garden that the plant can grow through but the cat won’t want to mess with climbing around. For your other questions, your new raised bed idea sounds great. Yes, you can use old potting soil but make sure you add new compost/soil to add new nutrients.
I have these great wooden boxes that I want to use for raised garden beds. They are at least 2 ft tall though. And that seems like alot of soil. I am wondering if I could use straw/hay bales on the bottom and cover them with soil.
Yes, you definitely can. Just keep in mind that straw will break down quickly and the soil level will drop, so be prepared to continue to “top off” the bed every few months. For that reason, I recommend not planting perennials in that bed because of the soil level dropping. Also, I would use caution with hay since it’s almost always contaminated with broad-leaf herbicide, unless you know it’s organic.
I have a cinder block garden and one day I got so frustrated with the weeds that I made a terrible choice to use a spectracide weed stop spray in all the holes. Even worse, I didn’t read the instructions and way over did the recommendation. I waited a coupe days and filled the holes with soil to plant marigolds. Im so upset with myself for reacting without researching, my big question now, is am I ever going to be able to plant edible herbs in those holes again? Is the food safe from my garden to eat this year?
I honestly have no idea. I’d recommend reading the label of the spray you used. Usually they give cautions if there are any concerns with growing edibles later or how long to wait before growing them.
My raised bed has recently performed horribly, after a bit of research (and digging) I discovered my Ash tree has infiltrated the bed with roots, it was sucking out all the nutrients and water and caused the soil to become compacted. I plan to replace the soil and while I’m at it I was thinking of lining my bed (bottom and sides) with a pool liner or other food-safe plastic. My beds are 12″ tall. I am wondering, will this work well if I drill holes in the sides of the bed 1″-2″ above the ground to allow drainage? I don’t think landscape fabric will be able to stop microscopic roots from ultimately getting back into my garden. What would you suggest, I think this is a very common problem with urban gardens, Thanks!!!
This might be an option for you: https://youtu.be/dlxsapM_1ec
Hi, Thank you. I think I will likely modify that, with perhaps 1-2′ of rock, then cloth, then soil, with a pipe in place to drain. But will 10″ of soil be enough for my vegetables, among others I grow carrots and beets? Again thank you!