Creating a Raised Row Garden Bed
Raised bed gardening is one of the most rewarding ways to grow a garden. Raised beds require less active work during the season, and because we control the soil quality, they can be more productive than an in-ground garden.
Sometimes, though, the biggest hurdle to cross before growing that lush raised bed garden is getting the raised bed structure in the first place.
What if you could, instead, create a raised bed garden without having to buy materials or build it yourself? Good news is, you can! All you need is a patch in your yard, organic materials, and soil. With just a few steps, you can create a raised row garden bed without the need to build a structure to go around it.

How to Create the Raised Row
The process of creating a raised row is basically the same as if you were filling a raised bed, without the bed. You’ll use the same type of materials to add to the ground, in the same order, that you would use to fill a raised bed with a structure.
(Click here to learn more about how I fill my raised beds.)
In the video below, you can see the process of how I built up my raised row bed:
Ingredients
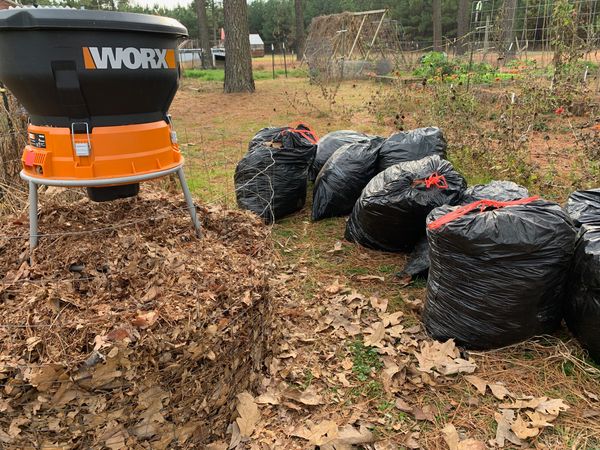
You can create your raised row with a variety of ingredients. Consider what you have on hand, like shredded leaves, straw, sticks, compost that hasn’t fully broken down yet, etc. The bottom layers should have the larger ingredients, leading up to topsoil and fine compost on top. You want at least a 6-8″ layer of compost/topsoil on top.
Shredded Leaves
For my raised row, first I added a layer of shredded leaves that I had saved from the fall (click here to learn more about how to use shredded leaves in your garden).
Straw
Second, I added straw from last year’s straw bale garden. Straw left over from a straw bale garden is a good thing to add to any of your planting areas. (To learn more about straw bale gardening, click here.) I chose to add the straw on top of the shredded leaves because the straw had been conditioned in the straw bale gardening process and had been breaking down into nutritious organic matter for a year. If I were to use fresh straw, I would choose instead to add it to the row before the shredded leaves.
Topsoil
Third, I added topsoil. I buy topsoil in bulk, but you could also use bagged topsoil. The purpose is to add a mineral source that will also provide structure to the row with the other organic matter.
Compost
Finally, I topped off the row with fine compost. Again, I purchase compost in bulk, so it has broken down completely and is fine enough to plant in. If I were using my own homemade compost, I may use it differently depending on how fine the material is. Compost with larger chunks would go toward the bottom.
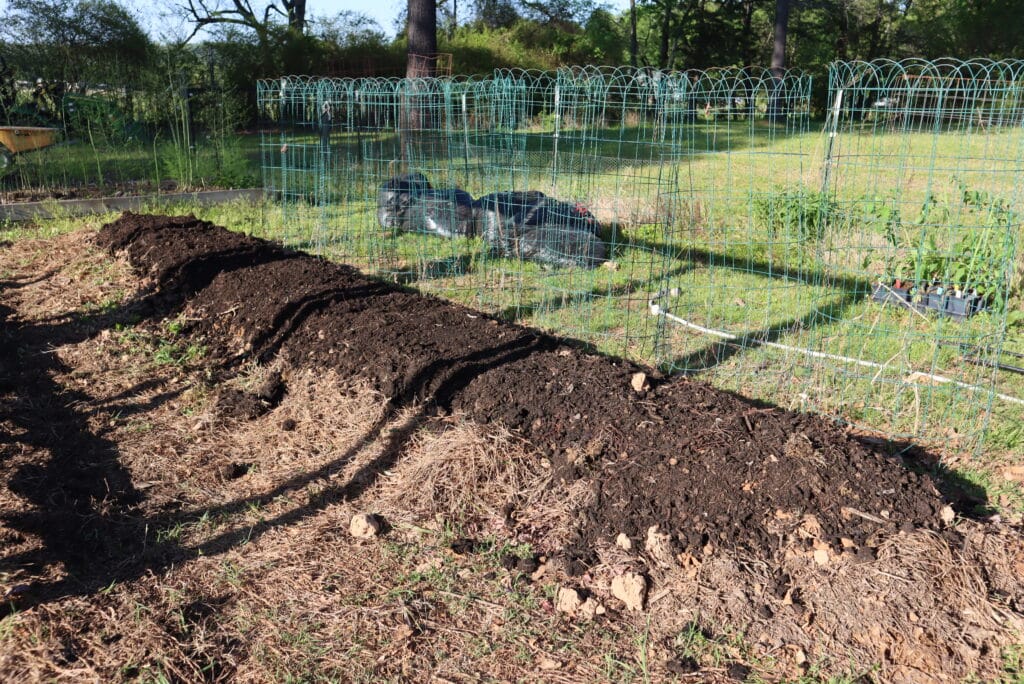
The most important part of the process was to ensure a 6-8″ layer of topsoil and compost combined. That’s because the root zones of most plants will focus on that top layer. The organic materials toward the bottom will continue breaking down and will act as a sponge to retain water in the lower levels.
Watering Requirements
Depending on your source material, you may need to saturate the raised row initially so your new plants have plenty of water to access. When I planted nine tomato plants in my raised row, I made sure to water each hole well at planting time — adding more than I would normally.
It is also important to watch the water levels throughout the season. In the absence of a structure, more of the row is open to evaporation. Of course, I always recommend adding mulch, and both the leaves and straw have moisture retaining properties that will help.
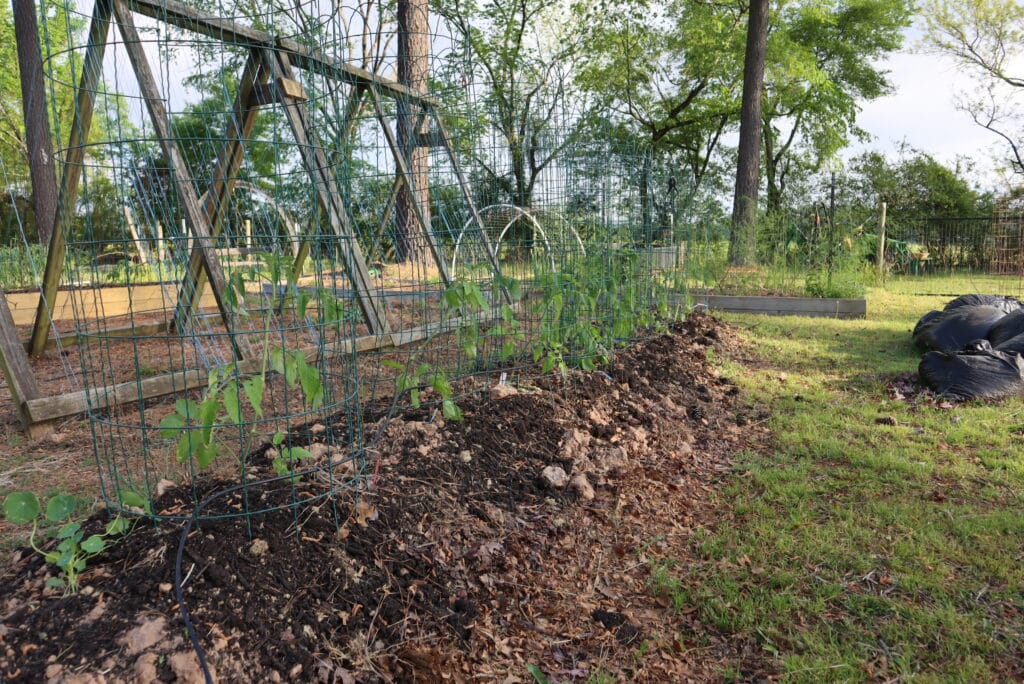
Best Placement in Your Garden
You can place your raised row in any place you would normally grow your garden. But, a raised row might be a particularly ideal solution to any problem areas in your garden.
In my case, I placed my raised row in an area of my garden that holds water doesn’t drain well. Being in a low-lying space, nothing I ever tried planting there has thrived. Raising this area up and allowing the crops to grow in this space will hopefully allow the water to drain away so they are not sitting in water.
Creating a raised row garden might just be the perfect option if you want to skip having to build or buy a raised bed structure –especially if your native soil isn’t the best quality for growing crops. By building “up” with high-quality ingredients, you might find your raised row thriving in a way it wouldn’t have otherwise.
If you have ever tried a raised row garden bed, I would love to hear your thoughts in the comments below.
Do you get overwhelmed with garden planning?

Subscribe here for my best tips to plan your garden in just 7 days -- all for FREE.
Plus, I'll send you my "In the Garden E-mail" on Fridays, periodic updates on garden resources relevant to you, and you'll receive access to my entire bank of free garden downloads!
You are also agreeing to our privacy policy.