
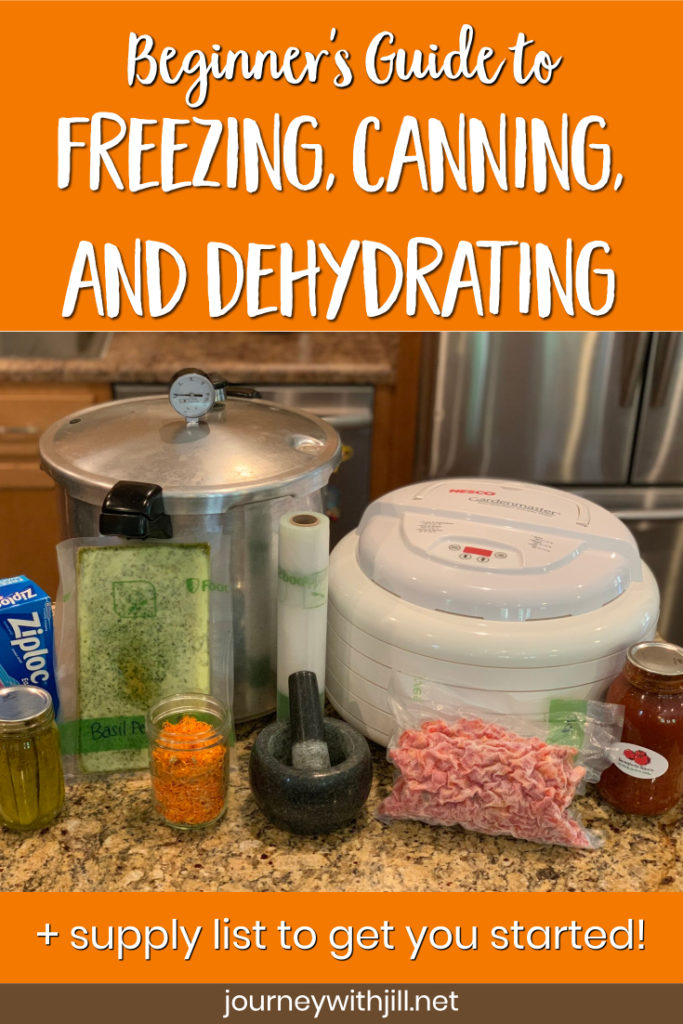
Preserving the Harvest: Beginner’s Guide to Freezing, Canning, and Dehydrating (+ Supply List)
Whether you grow your garden to stock up a year’s worth of some foods like I do, or maybe your small space has produced more than you can eat fresh, you will want to look at options for preserving the harvest.
While most people think of canning, this is only one option when it comes to preserving your hard-earned bounty.
In this episode of the Beginner’s Garden Podcast and article below, I share the basics of three common methods of preserving: freezing, canning, and dehydrating.
(Want to go directly to the supply list? Click here.)
*links below contain affiliate links
Freezing: the easiest way to preserve the harvest
Freezing is the simplest, needs the fewest supplies, and is popular with beginner gardeners.
Basic freezing supplies
Food Saver. I love my Food Saver. I was nervous when I first invested in it because I wasn’t sure it would be worth it. But it has been completely worth it! The Food Saver removes the air from the bag so that it takes up less space in the freezer and also keeps your food fresh longer. You can buy quart or gallon sized bags, but I use the rolls so that I can make each bag just the size I need.

High quality zip top bags. If you’re not ready to invest in a Food Saver, you can use zip top bags. But you should know that brand absolutely matters! I’ve tried using the less expensive store brand and they don’t work as well. Pay more for the quality bags so that your home grown food stays fresh as long as possible. I have had the best results with these.
Food processor. Another item I wouldn’t be without is my food processor with a shredder and slicer attachment. I use it to shred zucchini to freeze and put in zucchini bread later. I use the slicer to slice carrots to freeze. It is so much quicker to use the food processor than trying to get all of my vegetables ready to freeze by hand.
Should You Blanch Vegetables Before Freezing?
Blanching means that you boil your vegetable for a little while depending on the vegetable then you plunge it into ice water. This has been confusing for me! One year I blanched all of my corn and it turned out well. The next year I read a tutorial on freezing without blanching and my corn was ruined. You want to make sure you trust your sources!
The first book I ever read on freezing garden vegetables was The Beginner’s Guide to Preserving Food at Home. This book contains a list of what vegetables require blanching and which do not.
From this book, these vegetables should be blanched before freezing: beets, carrots, whole kernel corn, and green peas. Those that are optional and don’t have to be blanched are green beans, broccoli florets, cabbage, corn on the cob in its husk, and squash.
Best Tips for Freezing Vegetables
When you’re getting your vegetables ready to freeze, make sure to remove all of the air from the bag. A Food Saver will do it for you, but if you’re using zip top bags you’ll want to press out all the air you possibly can. The air produces oxidation and reduces the quality of your food.
Best Vegetables and Fruit to Preserve by Freezing
Deciding whether you should preserve something by freezing or canning is a personal decision. There are some vegetables, like green beans, that my family prefers canned while your family might prefer frozen.
I shred and freeze zucchini and squash to use later in zucchini bread, and some people slice it up to use it in stir fry.
Peppers and onions are perfect to flash freeze. After chopping, lay them on a cookie sheet to freeze; then scoop them into a bag to store them.
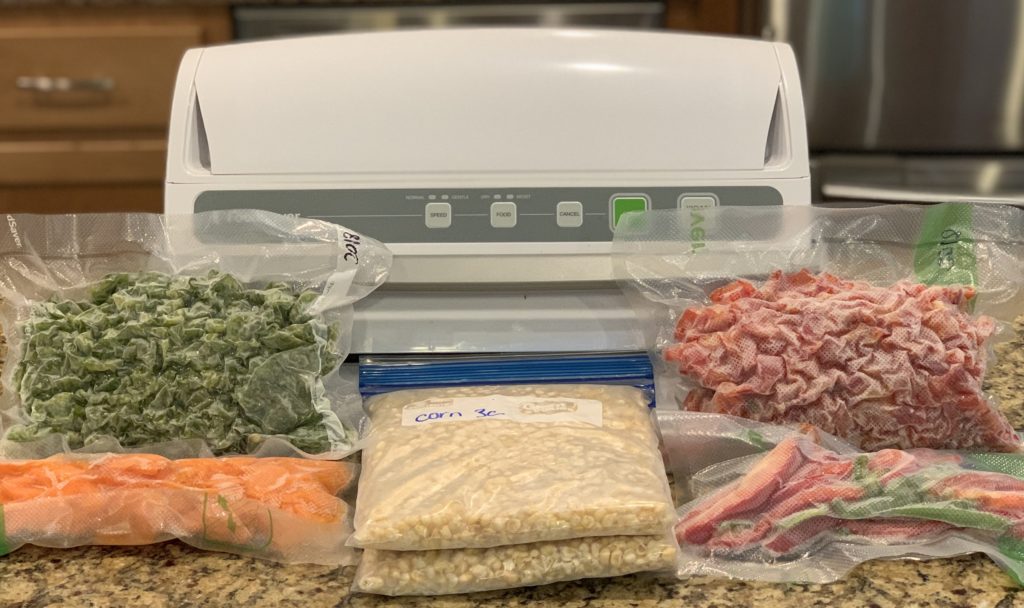
I also freeze berries. Raspberries and blackberries are so fragile, flash freezing is the way I prefer, but other berries like blueberries do not need that treatment. The important thing to remember about freezing berries is to wait to wash them until you’re ready to use your frozen berries. Do not wash them before freezing.
I also like to freeze corn, carrots, and basil pesto. We use basil pesto at least once a month, and by freezing we eat basil pesto year-round!
As you can see, you have many options when it comes to freezing vegetables!
Canning: the most common way of preserving the harvest
Home canning has experienced a resurgence in recent years, and for good reason! With canning, you can save freezer space and put aside plenty of food for the off-season.
There are two types of canning: pressure canning and water bath canning. It is important to know the difference! You can hear my conversation with Melissa K. Norris on getting started with home canning to learn more. It can feel complicated to get started but once you learn the basics it isn’t hard! If I could start canning my first gardening season, anyone can.
Basic canning supplies for beginners
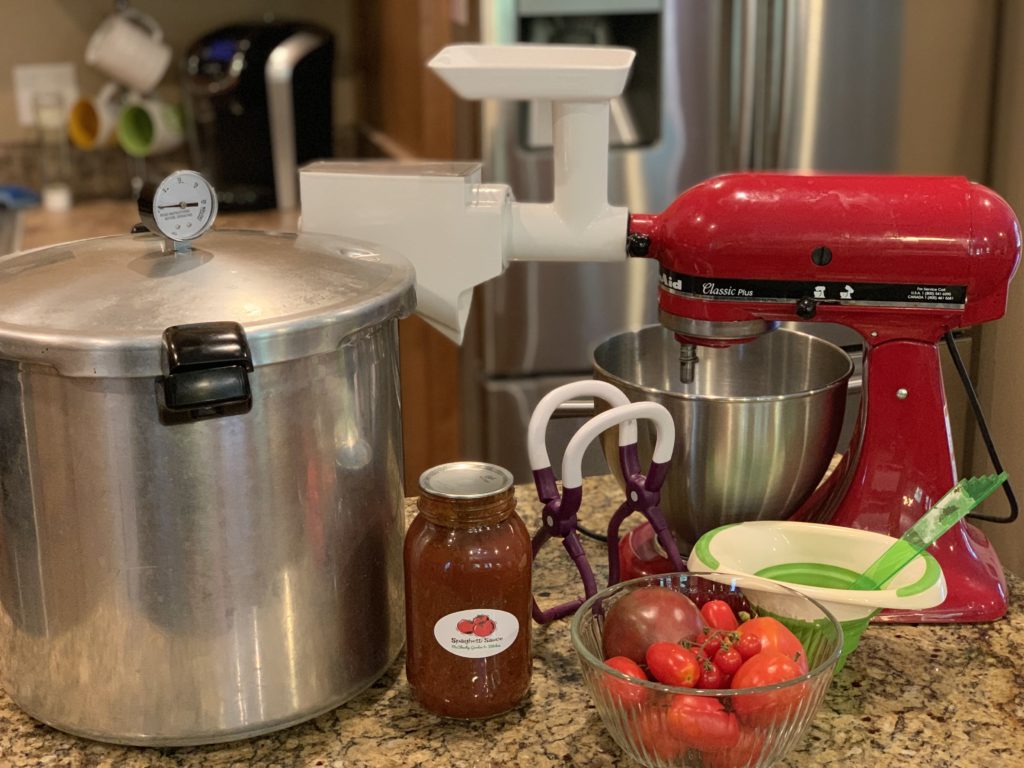
Pressure canner and/or water bath canner. I’d recommend starting with a pressure canner and/or a water bath canner. If you want to can any vegetables like green beans, shelling peas, or black eyed peas then you must have a pressure canner.
The good news is that you can also use your pressure canner as a water bath canner, but you can’t use a water bath canner as a pressure canner. If you plan to do any pressure canning at all, go with the pressure canner.
Only start with a water bath canner if that’s all you plan to do. You can use your water bath canner for pickles, jellies, fruit, and some tomato recipes. You can use a big stock pot if you can’t invest in a water bath canner just yet.
Canning Starter Kit. I’d also recommend a canning starter kit that includes a jar lifter, a funnel, and a magnetic wand for your lids. It makes everything so much easier! You will also need mason jars, lids, and rings. You can find jars at yard sales or given from friends and family. Let people know you’re looking and you never know where they’ll come from!
Kitchen Aid Fruit and Vegetable Strainer Attachment. Since I can a lot of tomatoes, I recommend the fruit and vegetable strainer with food grinder that attaches to a KitchenAid mixer. You can watch my video here where I talk more about canning tomatoes. This helps with any tomato sauce or paste.
(Note: KitchenAid no longer sells this attachment as one unit. Now, you must purchase the Food Grinder AND the Fruit and Vegetable Strainer Attachment both. Still, having used this for a decade and counting, it’s well worth the investment, in my opinion.)
Canning Resources. I recommend the Ball Blue Book of canning to everyone getting started with canning. It is a great place to start and then you can go on to other recipes.
If you want a more step-by-step approach (someone to walk you through the process), I highly recommend this FREE home canning Master Class from Melissa K. Norris. I watched it and learned so much I didn’t know, and I have been canning for years!
Best Tips for Canning Vegetables and Fruit
Always follow approved recipes! You want to make sure that the recipes you use have been approved for safety, and the Ball Blue Book of Canning is a great place to start.
Also, follow home canning experts like Melissa K. Norris, Jill Winger of the Prairie Homestead, and Theresa Loe from Living Homegrown.
Best Vegetables and Fruit for Canning
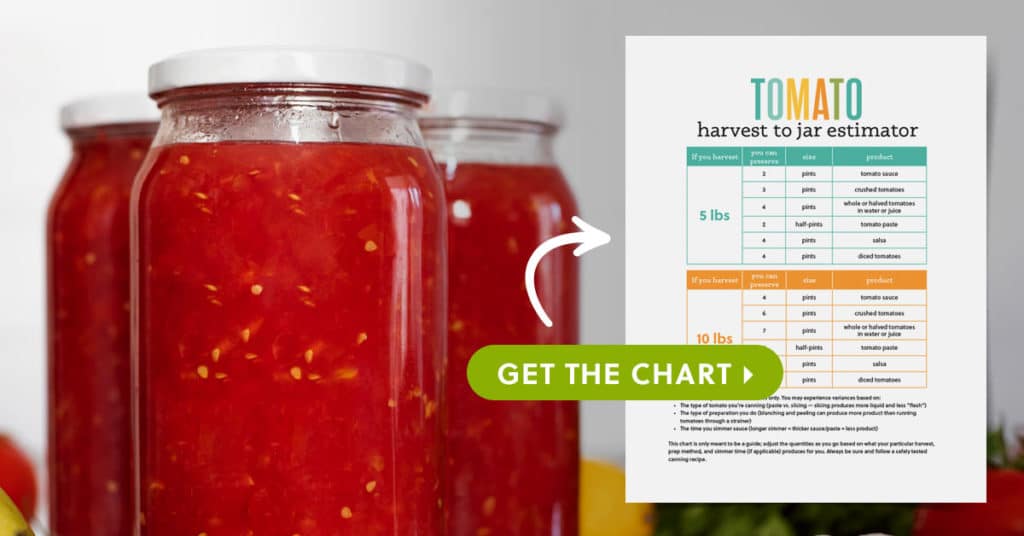
I can almost all of my tomato products (click here for recipes), green beans, black eyed peas, pickles, relish, pickled okra, jam, jelly, and corn.
Outdoor Canning
I’ve recently discovered the joys of outdoor canning! Using my Camp Chef Explorer Double Burner Outdoor Stove, I don’t have to worry about the kitchen heating up in the heat of the summer. Plus, the propane quickly brings water to boil for sterilizing jars, water bath canning, and pressure canning.

Dehydrating: a lesser-known option for preserving your harvest
Basic Supplies for Dehydrating
Dehydrator. The main appliance I recommend is a dehydrator. You can use your oven, but it needs to be very low at 100-120 degrees. My oven doesn’t go that low so I would need to keep my oven open and check on it frequently. It can work, but buying a dehydrator is well worth it.
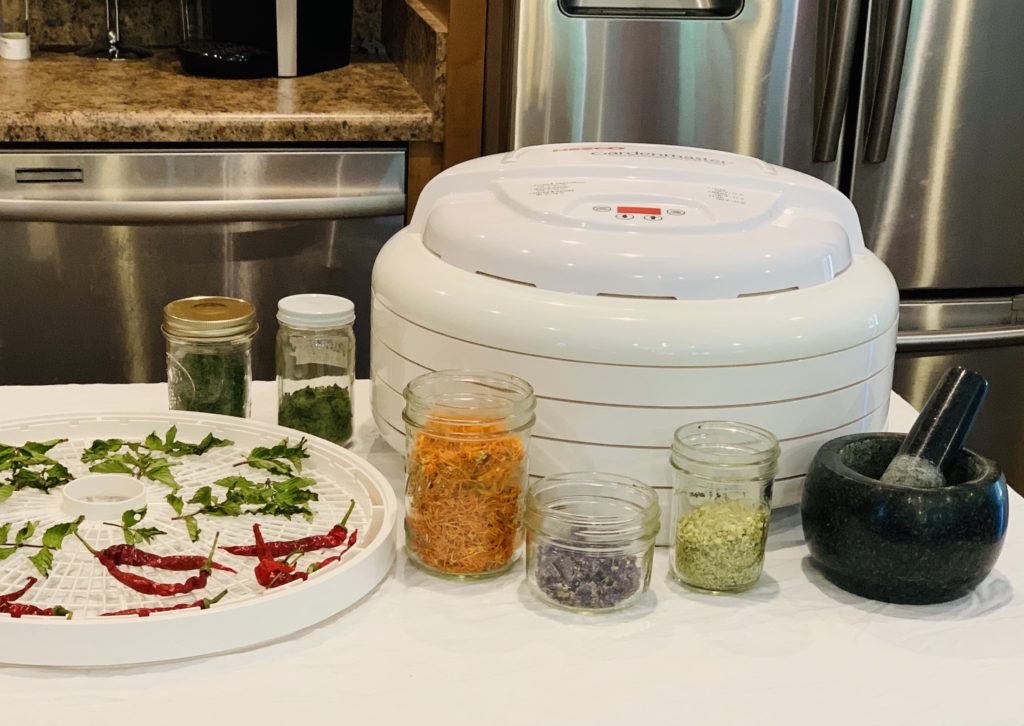
Mortar and Pestle. The second item on my list is a mortar and pestle. I asked for this for Christmas and I use it every day when I dehydrate herbs. A bonus is that my kids love using it and they can help in the kitchen!
Best Tips for Dehydrating Herbs
Pick the herbs in the morning because this is when they have the highest concentration in fragrant oils that you want.
Make sure they’re fully dry. If you are having any trouble with grinding your herbs, it could be that they’re not completely dry. If they’re not fully dry, they could spoil as they’re stored.
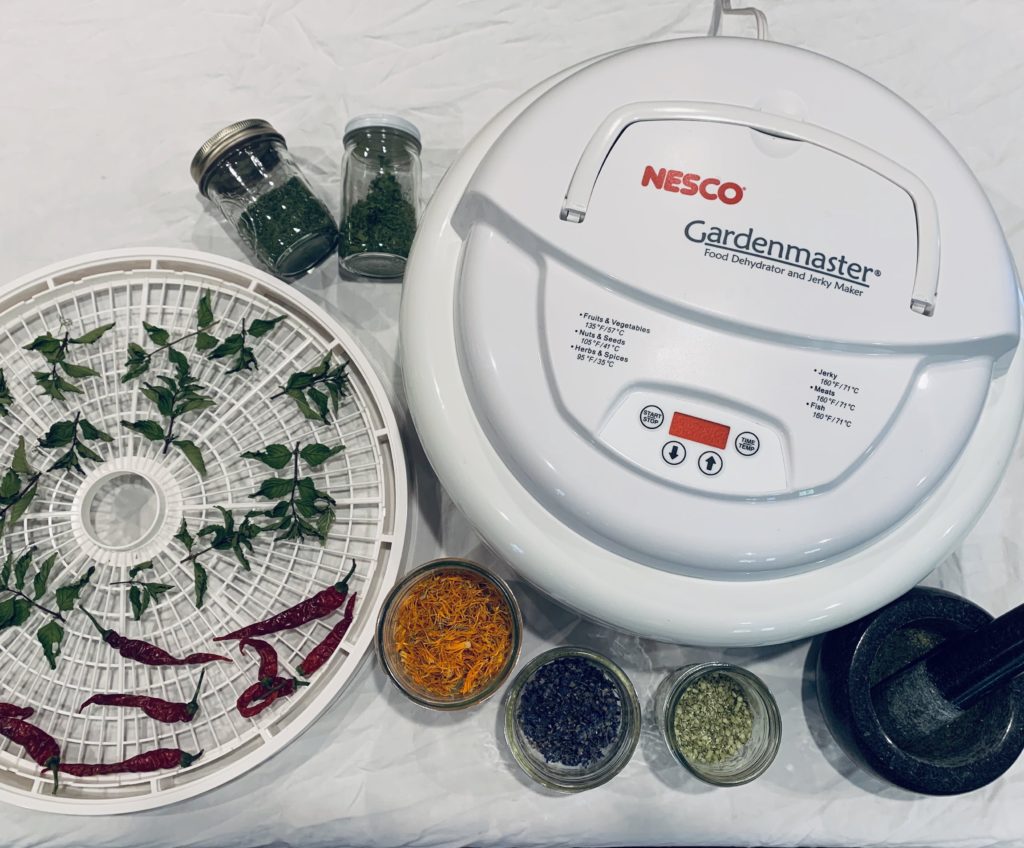
Getting Started: What to Dehydrate First
I like to dehydrate herbs like parsley, dill, and mint for cooking and teas. I also dry calendula and lavender flowers for personal care products. If I have extra garlic, I dry it and grind it in an old coffee grinder. It’s the best garlic powder I’ve ever had. And I enjoy drying cayenne peppers for cayenne pepper spice or crushed red pepper flakes.
Beginner’s Guide to Preserving the Harvest: Conclusion
All gardeners will begin adjusting their preserving methods as they learn from year to year. My guide definitely doesn’t cover every possible option. But my hope is that for beginners, this guide can help you get started and make the most of preserving your harvest this season!
Do you get overwhelmed with garden planning?

Subscribe here for my best tips to plan your garden in just 7 days -- all for FREE.
Plus, I'll send you my "In the Garden E-mail" on Fridays, periodic updates on garden resources relevant to you, and you'll receive access to my entire bank of free garden downloads!
You are also agreeing to our privacy policy.
Hi Jill! I love all your episodes but wanted to say that the digging deeper portion of this one really resonated with me and almost brought me to tears! I really appreciate your authenticity and willingness to embrace and own up to your imperfections, as I feel this makes you more relatable and trustworthy – important qualities in a teacher! (And, yes, you are a teacher. 😉 )
Also, a tip! When freezing produce in ziplock bags, I use a reusable metal straw to suck the air out prior to zipping shut. If done right, the ziplock “hugs” the produce, similar to the tight seal created by a food saver.
Thanks so much for everything you do! I’ve learned so much from you and am excited for future episodes. 🙂
Thank you so much for your kind words, Kristy! And that’s a great tip about the ziploc bags and a straw. Great workaround for when I don’t want to haul out my FoodSaver for smaller projects. Thank you!