• Home
  • In the Garden
  • Life & Faith
  • Nav Social Menu

    • Facebook
    • Instagram
    • Pinterest
    • Twitter
    • YouTube

The Beginner's Garden

Helping Beginners Grow a Rewarding, Successful Garden

  • Home
  • Meet Jill
  • Blog
  • The Beginner’s Garden Podcast
  • Speaking
  • Shop
  • Contact

Preserving Tomatoes – Making the Most of Your Harvest

in In the Garden· Summer Garden· The Beginner's Garden Podcast· Tomatoes· Vegetables

FacebookTwitterPinterestLinkedInEmail

Despite the odds, you’ve managed to get a pretty good tomato harvest. Now what? Even if you enjoy fresh tomatoes, you might find yourself with more than you can eat fresh. If this is the case, consider preserving tomatoes for the off-season.

In this episode of the Beginner’s Garden Podcast I share my preferred strategies on preserving tomatoes — most of which even a first-year gardener can do with ease.

Click below to listen or read the post below for the highlights, including the recipes you can use.

How to Start Preserving Tomatoes from Your Garden’s Harvest

I usually grow about fifty tomato plants per year, so I can a lot of tomato products. My goal each year is to can enough of my favorite recipes to last me all year.

But, if you’re like most backyard gardeners, you probably don’t grow that many tomatoes. So, depending on how much you have to preserve, you want to make the most of what you have.

You’ll need to prioritize what to can first. Here are a few factors I use to decide.

What you normally eat.  Consider what type of tomato products you typically purchase from the store. Do you eat a lot of spaghetti? Chili? Salsa? Pizza?

What comes in a can. My second priority is to can tomato products that usually come in a can (not a jar) from the grocery store. The lining of those cans contain BPA, a known carcinogen, which is thought to leach at a higher rate thanks to the acidity of the tomato product.

After I’ve decided what factors are most important to me, I begin canning.

Tomato Recipes for Canning

7 Proven Tomato Recipes for Canning

(some links below container affiliate links.)

Tomato Sauce

Tomato sauce is the easiest tomato product to can. Even a beginner can easily water-bath can tomato sauce, and it’s versatile to use in so many ways in the kitchen. You can use it to make your own spaghetti sauce, cook it in chili, make your own pizza sauce, and much more.

I use the Fruit and Vegetable Strainer from my Kitchen Aid Mixer to make sauce quickly and easily. I don’t have to blanch or peel the tomatoes. After the juice is extracted, I simmer it for several hours until it reaches the desired consistency. Once the simmering is complete, I begin the process of canning.

VIDEO: Use Your Kitchen Aid Mixer to Cut the Time it Takes to Prepare Tomatoes for Canning 

Get your Kitchen Aid Fruit & Vegetable Strainer Attachment here: (affiliate link)

If you don’t have this attachment, you can extract sauce by blanching, peeling, and crushing (or blending) your tomatoes. It takes longer but produces the same great result.

Tomato Sauce Recipe: Tomato Sauce (water bath or pressure canning) by Melissa K. Norris

Tomato Paste

The next product I can is tomato paste. Processing it uses a similar process as tomato sauce, except you simmer it down much further. The recipe I use also calls for red bell pepper, bay leaves, and garlic for flavor, though sometimes I omit the red pepper if I don’t have it on hand.

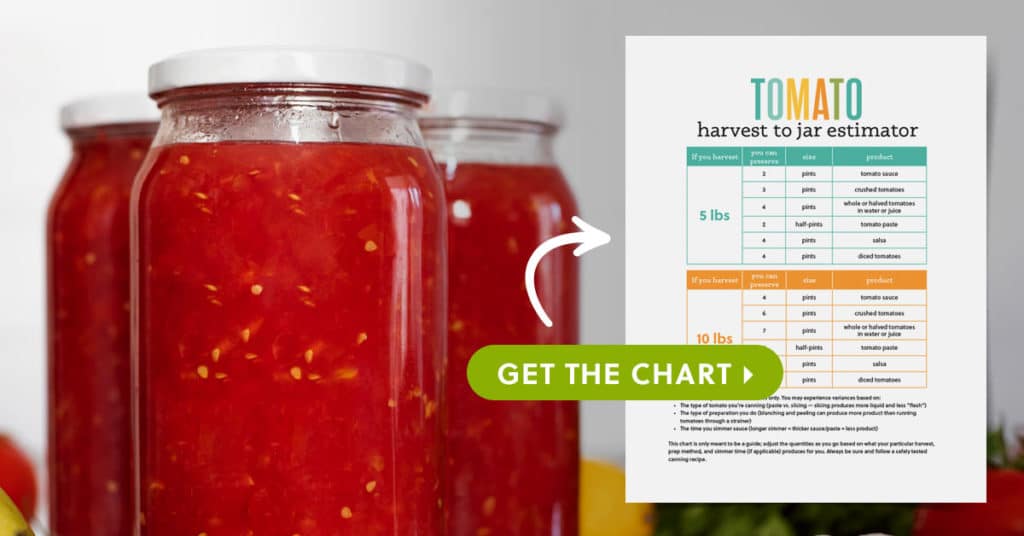
The thing to keep in mind is the final product will be about 1/4 of what you start with. For example, if you begin with 5 quarts of juice/sauce, you’ll end up with about 5 half-pints of paste. For many, this can be quite depressing, and it’s an option I wouldn’t recommend if you don’t have a huge amount of excess tomatoes. But, if you do, tomato paste is a great option. I love having tomato paste on hand for lasagna and chili all season.

Recipe: Tomato Paste from Pick Your Own

amish paste tomato

Spaghetti Sauce

My spaghetti sauce starts out as tomato sauce. I process the tomatoes through the Kitchen aid mixer as I do for sauce and paste, but after the sauce has reached the desired consistency, I add the vegetables and simmer for about 30 minutes before I begin canning. Because of all the vegetables, spaghetti sauce does require pressure canning.

Recipe: Spaghetti Sauce for Canning by Common Sense Home

Stewed Tomatoes

Our favorite lasagna recipe calls for stewed tomatoes, so I love to have pints or quarts of it on hand. Like spaghetti sauce, stewed tomatoes does require a pressure canner due to the acidity of the vegetables.

canned tomatoes

Because stewed tomatoes don’t begin with a sauce base, I have to blanch and peel the tomatoes, which does add time, but it’s definitely worth it.

Recipe: Stewed Tomatoes from Simply Canning

Crushed Tomatoes

If you don’t have enough tomatoes to can at the moment, here’s a trick for you. Stick your tomatoes — whole — in the freezer. Then, when you have enough for a canner load, thaw them in the sink, slip their skins off, and crush them with a potato masher. This is an easy trick to making crushed tomatoes at the end of the season.

But if you know you want to can crushed tomatoes, you don’t have to wait til the end of the season. Just blanch and peel the tomatoes and crush them with a potato masher. Then you can follow the process of water-bath canning them for use in chili, salsa, and other recipes that call for diced tomatoes.

Recipe: Crushed Tomatoes from Fresh Preserving

RoTel (Diced Tomatoes with Green Chilis)

If you regularly use diced tomatoes with green chilis in recipes like taco soup, chicken spaghetti, or cheese dip, it’s fun to have homemade RoTel on hand. If you grow green chili peppers, this is a great way to use both excess tomatoes and chili peppers.

Due to the peppers, you must pressure can this recipe.

Recipe: Homemade RoTel from The Kitchn

Salsa

It took me six years to find a canned salsa recipe that our family enjoys. The ones we initially tried were just too vinegar-y or had too much lemon or lime juice (necessary for canning) to taste good. But in 2019, thanks to crowd-sourcing from Instagram, I now have TWO salsa recipes we enjoy!

Canned Salsa Recipe

One thing to keep in mind — you cannot can just any salsa recipe safely. Tomatoes are borderline on their pH level, and when you add any type of vegetables, this raises the pH even more, making water-bath canning unsafe unless you include a proper amount of acid. The only way to can homemade salsa safely is to use a tested recipe. 

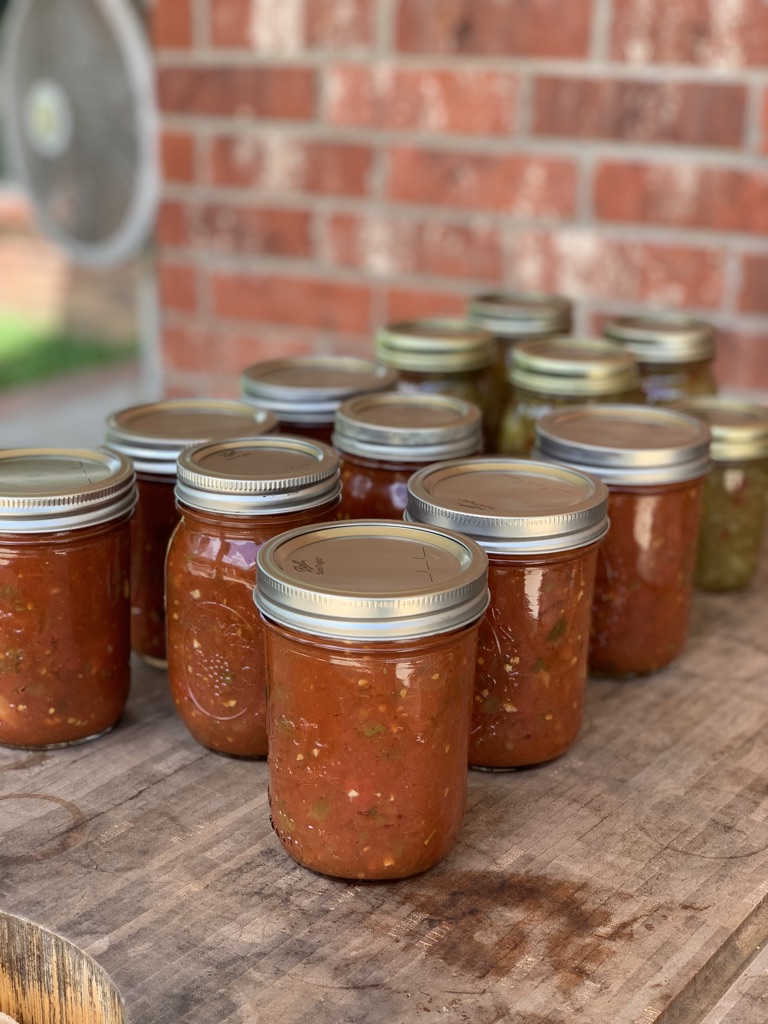
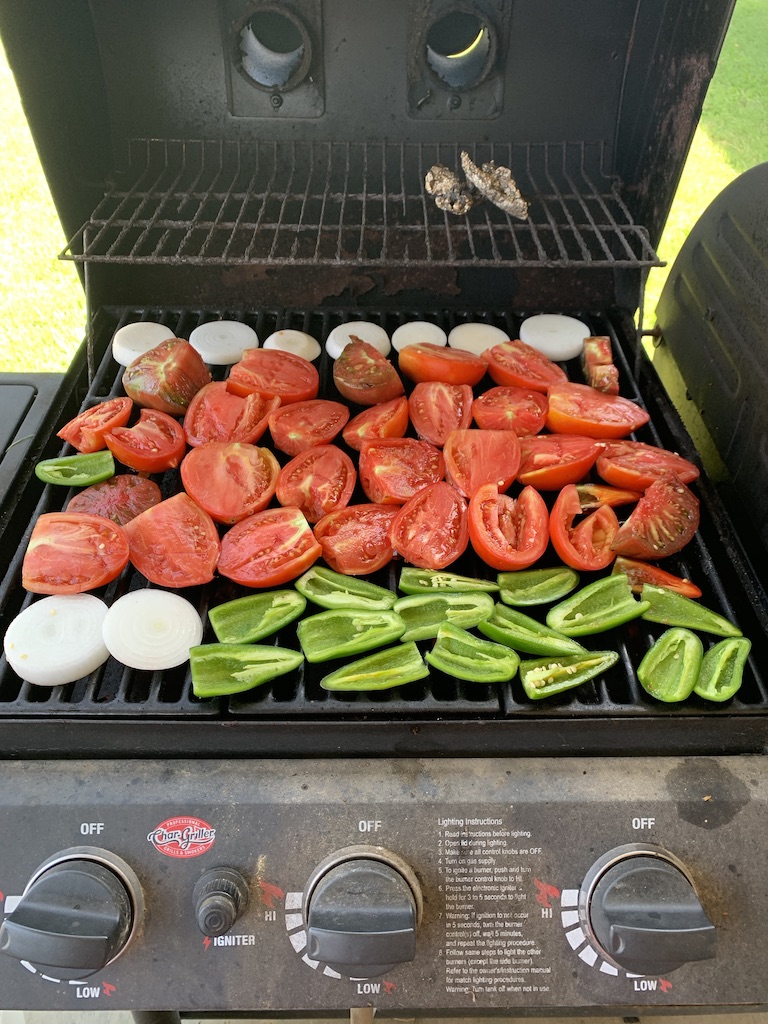
Thankfully, both of the recipes I found have been tested. The first is Annie’s Salsa. It is a good all-purpose salsa that requires more chopping and prep-work but once that’s done, it’s pretty easy. The second is Roasted Tomato-Lime Salsa from the book Foolproof Preserving. The main prep-work here is roasting the vegetables (which I do on my grill). The taste is a more smoky flavor that we love.

Grilling salsa ingredients for roasted tomato salsa

Recipe: Annie’s Salsa
Book: Foolproof Preserving (EVERY recipe I’ve tried in this book has been delicious! This should be a staple in every home food preserver’s bookshelf.)


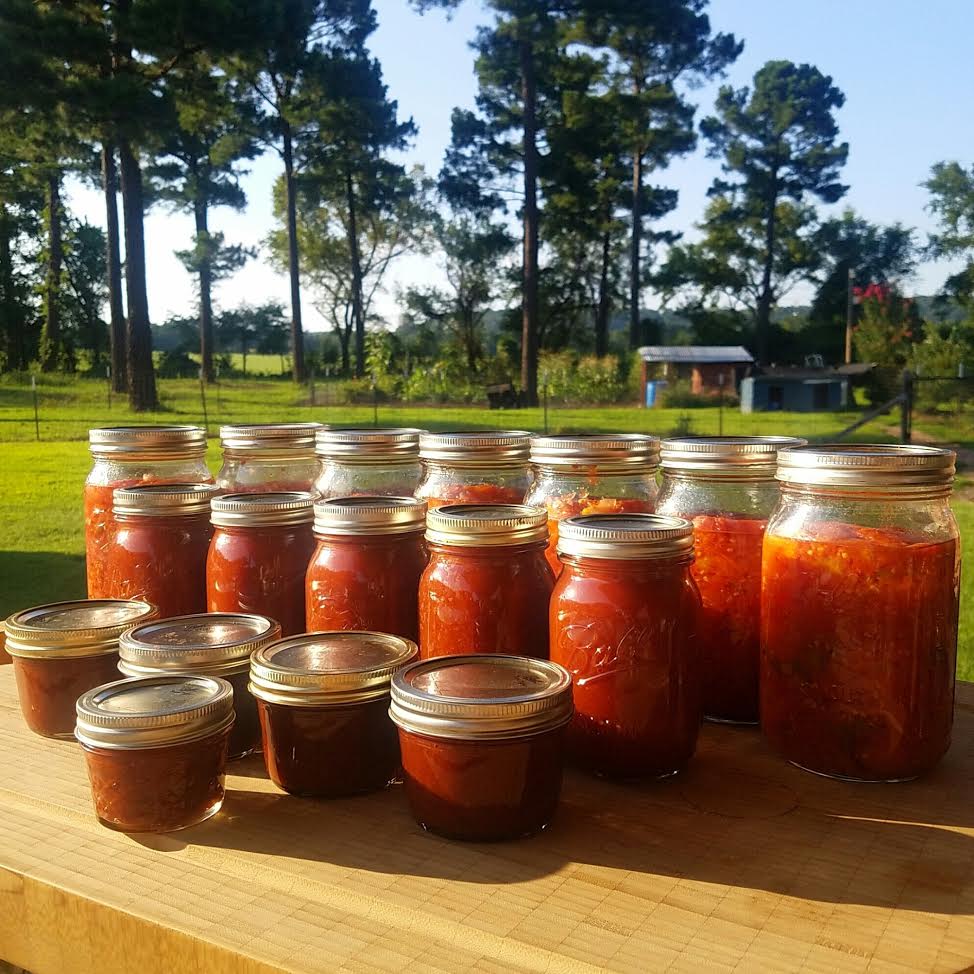
For me, there’s nothing like a pantry full of tomato products I grew myself (without pesticides) and canned myself (without chemicals). And don’t worry if you don’t have fifty tomato plants to supply your tomato needs all season. But if you do have some extra, I hope this will give you some ideas on how to use them.

I will warn you, although canning is work, it is also kind of addicting. I started out gardening with 1 or 2 tomato plants, and look where I am now! So, you have been warned. 🙂

Additional Tips & Resources:

If you’re a regular listener to the Beginner’s Garden Podcast, you’ve probably heard me talk about how I don’t like fresh tomatoes. And because I don’t eat them that way, I mainly grow only paste tomatoes.  As I talked about in episode 8 – How to Grow a Salsa Garden – using canning or paste tomatoes will save you time because they have more flesh and less juice. But, if you’re using slicing tomatoes, all of what I’m talking about here will still apply; you just may have to simmer some of these recipes longer.

If you’re brand new to canning, I highly recommend this book, The All New Ball Book of Canning and Preserving: (affiliate link)

Grow Ingredients for Fresh Salsa!

Do you want to make delicious, homemade salsa from fresh-picked ingredients you grew yourself?

In this guide I will teach you how to grow a salsa garden, from planning to canning, and everything in between.

Enter your e-mail address and I'll send you this 28-page download for free!

Plus, I'll send you my "In the Garden E-mail" on Fridays, periodic updates on garden resources relevant to you, and you'll get access to my entire bank of free garden downloads!

You are also agreeing to our privacy policy.

Success! Now check your email to confirm your subscription, and your guide will be on its way!

There was an error submitting your subscription. Please try again.

Powered by ConvertKit

Other Posts You Might Like:

FacebookTwitterPinterestLinkedInEmail

Filed Under: In the Garden, Summer Garden, The Beginner's Garden Podcast, Tomatoes, Vegetables Tagged With: growing tomatoes, tomatoes

Previous Post: « Common Squash Pests: Squash Bugs and Squash Vine Borers
Next Post: 5 Easy Crops for the Beginner’s Fall Garden »

Reader Interactions

Leave a Reply Cancel reply

Your email address will not be published. Required fields are marked *

I accept the Terms and Conditions and the Privacy Policy * for Click to select the duration you give consent until.

This site uses Akismet to reduce spam. Learn how your comment data is processed.

Primary Sidebar

Hi! I'm Jill McSheehy and I'm so glad you stopped by! If you're a beginning gardener needing help getting started or an everyday gardener looking for new ideas, you're in the right place!

You'll find gardening articles, The Beginner's Garden Podcast, and more!

To learn more about me and follow along in my journey, visit "Meet Jill" here, and subscribe above for instant access to all of my free gardening downloads, plus my Friday e-mail full of relevant gardening tips and ideas to help you grow your best garden!

From the Shop

Learn More

Most Popular Posts

  • 7 Common Mistakes in Raised Bed Gardening
  • 3 Raised Bed Soil Mixes Compared
  • Growing Blueberries? Avoid these 4 Beginner Mistakes
  • Is Indoor Seed Starting Right For You?

Categories

Follow Me on Instagram

Notice a difference between the cabbage seedlings Notice a difference between the cabbage seedlings on the left and the ones on the right?
.
.
I just love testing different things in my garden, and for these seedlings I tested two treatments I’ve never tried before: foliage feeding and a “root dip” using the plant growth product, Organic REV.
.
.
The plants on the left were untreated; the ones on the right were treated.
.
.
A few weeks ago I filled a spray bottle with a diluted Organic REV mixture (per their instructions) and I sprayed the young seedlings on the right. They responded well and began to outpace the untreated group slightly — it was small but definitely noticeable.
.
.
Then last Friday I transferred the seedlings into these larger pots, but before I did it, for the plants on the right, I dipped the root ball in a 50/50 REV/water mixture, saturating the soil and roots before transplanting. Again, the plants on the right were the only ones that got this root dip.
.
.
The soil all plants are growing in is the same: a potting mix plus some Plant Tone organic fertilizer.
.
.
It was after this root dip and transplant that the seedlings on the right started pacing much more ahead of the ones in the untreated group.
.
.
While all the seedlings (treated and untreated) are growing in this fertile soil medium, what Organic REV is supposed to do is appearing to prove true — at least in this test. It helps plants more efficiently take up and use the nutrients that are present in the soil.
.
.
.
.
Organic REV is now a brand partner of the Beginner’s Garden. They sent me their product to try first, and I’m continuing to test it in different ways.
.
.
But what I’m sharing with you is my own experience and results. If you’re interested in their product, look them up here: @buyorganicrev Use my affiliate code JILL10 to get 10% off if you want to try it for yourself.
.
.
.
.
#organicrev #foliarfeed #foliarfeeding #indoorseedstarting #indoorseedlings #pottingup #cabbage #cabbageseedlings #organicgardening #organicfertilizers
I don’t know if I’ll ever get used to harvesti I don’t know if I’ll ever get used to harvesting from my garden in the winter. It snowed today, even! (Okay, just a dusting, and it already melted, but in central Arkansas, any snow is worth celebrating! 😂)
.
.
Although I’ve grown cabbage in the spring before, this is my first time harvesting a fall crop. (My last two attempts were thwarted by hungry rabbits or rogue hens 😡.)
.
.
I have several more plants that I’m hoping to harvest from now that the days are getting longer and maybe the heads will start growing again. And I also have a new crop started in my grow room.
.
.
Four-season gardening may sound daunting but I assure you, fall and winter gardening is almost a hands-off endeavor. The only thing it really takes is a little planning (and some nurturing in the beginning).
.
.
And the reward of picking from your garden in the winter (when your climate allows) can’t be overstated. It’s fabulous!!
.
.
If you’re interested in learning how to incorporate more seasons in your garden growing, I have several exciting new resources coming up, starting with tomorrow’s first podcast of the new year on deciding if indoor seed starting is right for you!
.
.
As much as I’m enjoying this winter harvest, I’ve already got one eye in spring! You, too? 😊
.
.
.
#cabbage #growingcabbage #wintergarden #winterharvest #zone7b #arkansasgarden #zone7gardening #gardenplanning
This fall-planted parsley 🌱 has done really wel This fall-planted parsley 🌱 has done really well in my Greenstalk Vertical planter. I recently harvested the lower leaves and dried them for use in the kitchen. But the rest of the plant is still growing well, and I expect to harvest from it for months to come.
.
.
I planted the parsley along with other plants in the Greenstalk planter in September. Although the lettuce is done and I harvested the celery, the herbs like parsley, cilantro, chives, and oregano are going strong!
.
.
I LOVE that I don’t have to buy almost all herbs from the store, even in the winter.
.
.
.
.
#herbs #parsley #herbgardening #greenstalkplanter #greenstalkverticalplanter #containergarden #containergardening #containerherbgardening #wintergarden #winterharvest #winterherbs #zone7b #zone7gardening
I’ve spent the better part of two days selecting I’ve spent the better part of two days selecting and ordering seeds for this year. My husband thinks my intensive research is a bit over the top. Maybe.... 🤔
.
.
But here’s what I do:
.
1️⃣ Select the seed companies I’ll purchase from. Most of my orders were from @southernexposureseed because I’m in the SE US and the varieties there fit my climate well. Next, I placed a large order from @territorialseedcompany (great selection, informative catalog, and some of the best prices). From there, I supplemented with seeds from @bakercreekseeds (high quality heirloom seeds, highly dependable, free shipping), @johnnys_seeds (unique varieties for different needs than I can get elsewhere), and @seed_savers_exchange (heirloom seeds with a great mission).
.
.
2️⃣ I went through my top 3 catalogs, circling varieties I was interested in.
.
.
3️⃣ I entered each variety in my Seed & Plant Research sheet from my Complete Garden Planner, noting unique characteristics, days to maturity, and price. (Not all seed packets are equal in quantity so it pays to be a savvy shopper.)
.
.
4️⃣ I chose which seeds to purchase.
.
.
I usually plan my entire garden before ordering seeds, but I was a bit nervous about the seed supply (thankfully only a few varieties were sold out), so I did my best in choosing what I’d need.
.
.
The process was LONG but a great way to spend the last two days of 2020 — with HOPE for the 2021 garden season! 💕
.
.
Have you ordered seeds yet? Where do you like to order from?
.
.
(My printable Complete Garden Planner is available in my shop, link in profile.)
.
.
#seedshopping #orderingseeds #gardenseeds #garden2021
#gardenplanning #gardenplans #seedcatalog #seedcatalogs #wheretobuyseeds #gardening #gardeningtips #gardentips
My greenhouse lettuce is coming along! 🥬 I expe My greenhouse lettuce is coming along! 🥬 I expect now that the day length ☀️ will be increasing, the growth will accelerate in the next couple of months.
.
.
I think I planted these in early October, so you can see how slow they grow this time of year, even in the warmth of the greenhouse. But it’s so nice to see signs of growth and hope for future lettuce harvests! 🥬
.
.
I’m almost to the end of my main fall lettuce, so I’ll be glad when these are ready to eat!
.
.
#lettuce #greenhouse #greenhousegardening #wintergarden #wintergardening #greenhouselettuce #falllettuce #growbag #growbags #greenhousegardener #containergardening #containergarden #containerlettuce
Would love to hear your personal experience using Would love to hear your personal experience using shredded leaves as mulch! 🍂
.
.
🌲 The trees on my property are mainly pine trees, so I’ve never had fallen leaves to collect and use as mulch. (That’s mainly why I use wood chips.) But when my dad offered to collect and bag up his leaves and give them to me, of course I said yes!
.
.
Twenty-five bags later I realized I needed to figure out how to best use them. I knew they’d blow away if I just dumped them on the garden and they’d take forever to break down if I threw them in the compost pile. So I watched a few YouTube videos and settled on a leaf shredder.
.
.
(A lot of people use lawn mowers to mulch their leaves but we don’t have a mower like that. I also tried the weed-eater as an immersion blender in a trash can idea once and it was a disaster.)
.
.
I LOVED this leaf shredder! It was really easy to use and I shredded 25 bags in just a couple of hours. Most people shred the leaves into bags but I created a simple wired bin to collect mine, and I shredded the leaves directly into it. I applied the leaves to several beds already but I have half of them still in the bin to use later.
.
.
How do you use fall leaves in your garden? I’m excited to try this method that I have enviously watched so many gardeners use over the years!
.
.
.
#leafshredder #leafmulch #leafmulching #leafmulcher #fallenleaves #autumnleaves #mulch #gardentips #fallgardening #gardenchores #compost #leavesasmulch #fallgardencleanup @worxtools
Follow on Instagram

Join Me on Facebook

Join Me on Facebook

Footer

Disclosure:

Some links on this site are affiliate links, which means I may receive a small commission if you purchase products I recommend. This does not cost you any more but does help me offset some of the costs associated with this blog. I only promote items I personally recommend and think provide benefit to my readers. Journey with Jill is a participant in the Amazon Services LLC Associates Program, an affiliate advertising program designed to provide a means for us to earn fees by linking to Amazon.com and affiliated sites.

Read my Privacy Policy, Disclaimer, and Terms of Use.

Stay Connected

  • Facebook
  • Instagram
  • Pinterest
  • Twitter
  • YouTube

Copyright © 2021 Jill McSheehy | Design by The Design Diva | Development by MRM