
6 Raised Bed Irrigation Options for Home Gardens
How will you water your raised beds? In this article, we discuss the pros and cons of 6 different options for raised bed irrigation.
Whether you’re growing your vegetable garden in one raised bed or many, you want to have a plan for how you will water your growing plants.
After having grown in raised beds for a decade, I’ve tried multiple raised bed irrigation techniques. Depending on the quantity of your beds, your budget, and other factors, one might prove a better option than others. Let’s take a look at the options:
- hand-watering
- overhead watering (sprinkler)
- soaker hose
- drip lines
- drip tape
- garden irrigation grid
*Disclosure: links below may contain affiliate links, which means if you click and make a purchase, I’ll earn a commission at no extra cost to you.

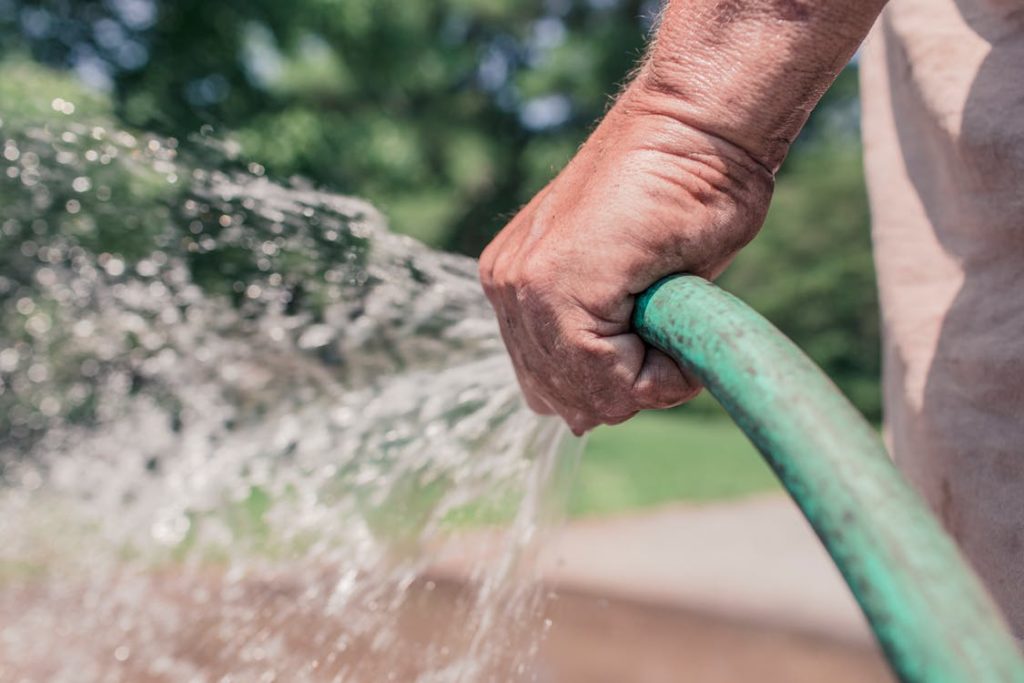
Hand Watering for Raised Bed Irrigation
If you’re just beginning as a gardener and you only have one or two raised beds, you may find that hand-watering is doable for you. Many gardeners enjoy hand-watering, finding it therapeutic in a way.
Another benefit to hand-watering is getting “up close and personal” to your plants. By having this dedicated attention, you’re more likely to discover pest or disease problems early enough to take action before they become a problem.
Of course, by relying on hand-watering, you’re committing to being the sole source of your plants’ water when rainfall doesn’t come. This may prove problematic, especially in the summer when rain is scarce or you’re leaving your garden for a vacation — or both.
If you do choose hand-watering, I recommend you make it as simple as possible. I have started using the Hoselink Retractable Garden Hose for ease of use and to keep my garden area tidy. Below is a 30-second clip of how the Hoselink reel works.
Benefits of Hand Watering:
- you have control over the amount of water you use
- you get an up close look at your plants, discovering problems early
- you can aim for the root zone, limiting evaporation and keeping water from splashing on plants, which can exacerbate fungal disease
- some people find it peaceful
Drawbacks of Hand Watering:
- overwatering is very common and can hurt your plants
- you have to tend to it often, sometimes daily
- it’s cumbersome to lug out the hose every day, unless you use a tool such as the Hoselink retractable garden reel
Overhead Watering
Many gardeners choose overhead watering using a sprinkler for their gardens. While this may be a reasonable option for larger in-ground gardens, it’s less reasonable for raised bed gardens.
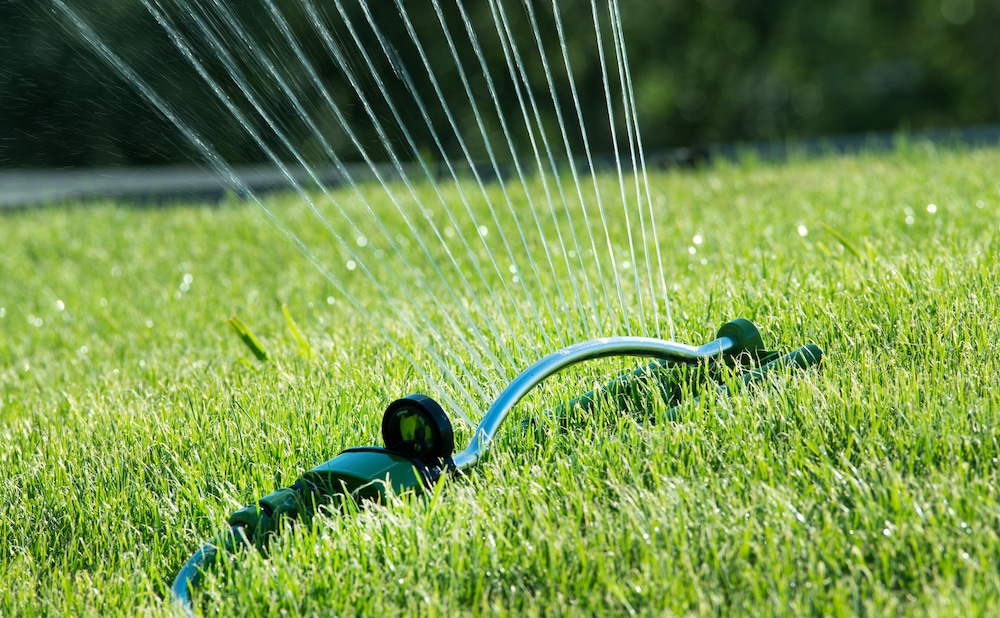
The main reason is that you end up watering the pathways, which you usually would want to keep clear. If your pathways are ground, you’ll be watering grass and weeds, leading to more maintenance to keep the area tidy. If your pathways are gravel, you’re wasting water.
Still, using overhead watering may end up being an option for you.
Benefits of Overhead Watering
- you can put it on a timer so it’s less disruptive to your daily life
- overhead watering can keep plants cooler in the heat
- not complicated to set up
Drawbacks of Overhead Watering
- water is lost to evaporation (this is wasteful and can be expensive)
- can make fungal diseases worse, especially if you live in a humid area
- when you water the walkways, you likely water the weeds
- the watering can be uneven
Soaker Hoses in Raised Beds
Soaker hoses are probably the most common way to irrigate raised beds. They are inexpensive, easy to set up, and they weep the water along the entire hose. Because the water goes directly into the soil, it is not lost to evaporation. Plus, with no water splash-up on the leaves, this can help pressure from fungal diseases.
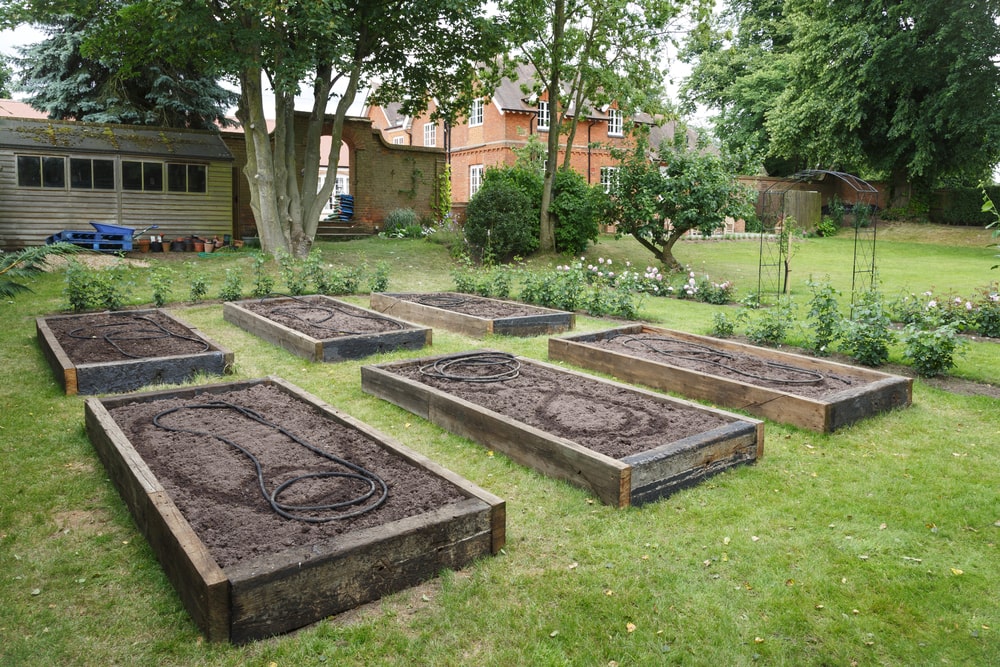
The main problem I’ve had with soaker hoses as my primary raised bed irrigation method is that over time, they lose functionality. I’ve found that my beds fail to get irrigated as well as they once did after 2-3 years.
Benefits to Soaker Hoses
- inexpensive
- easy to set up
- you can buy in different lengths depending on the size of the bed
Drawbacks to Soaker Hoses
- over time, they are not as effective (clogging is common but not always noticeable)
- can get expensive if you have multiple beds
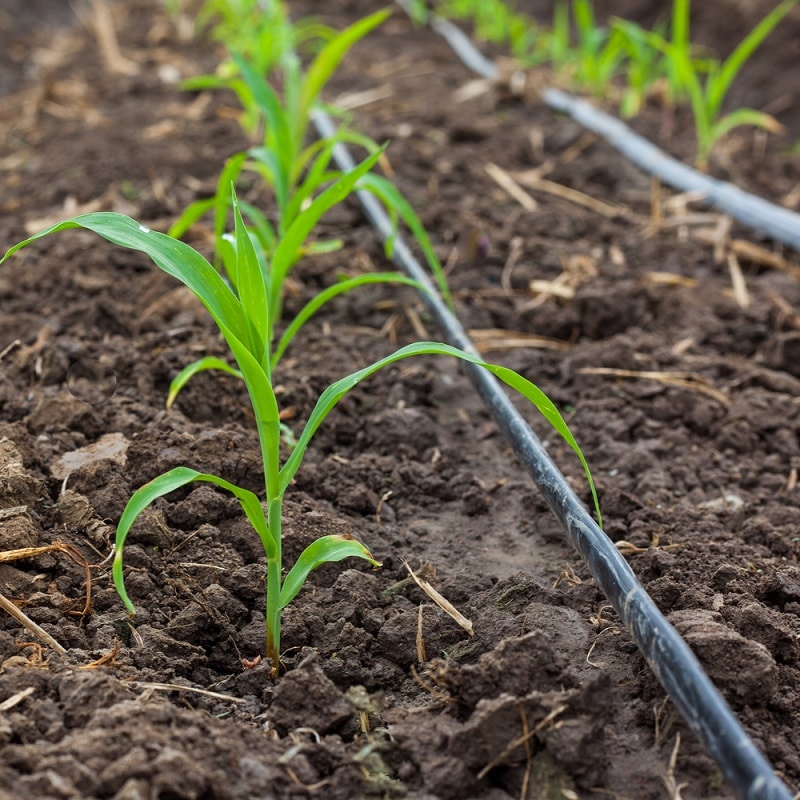
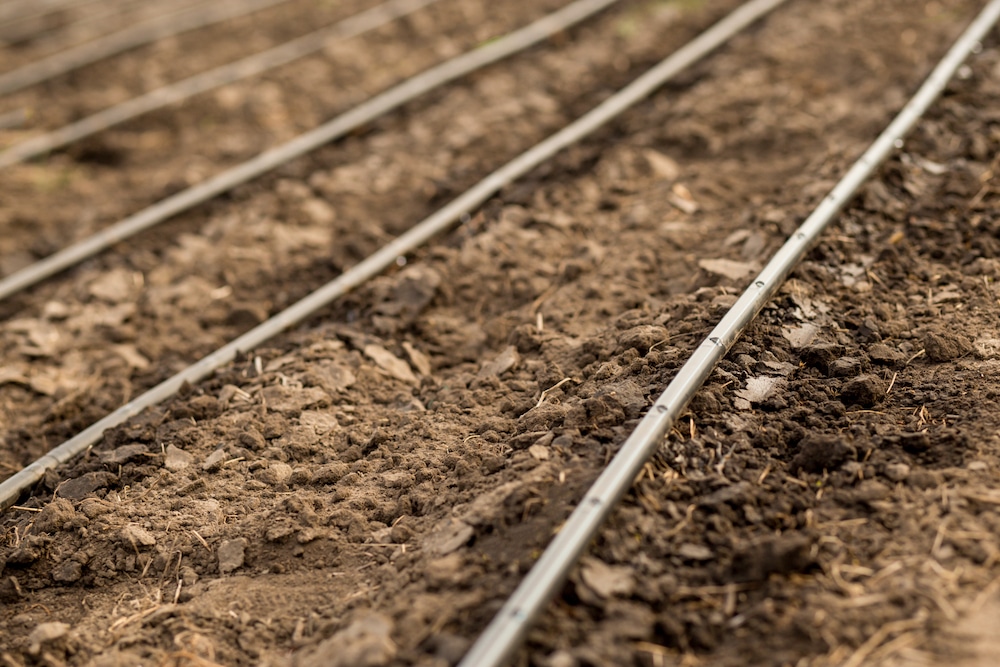
Drip Lines
I transitioned my entire garden to drip lines several years ago, including my dozen or so raised beds. Drip lines are small tubes with holes called emitters positioned along the tube. Some tubes have the holes at a 6″ spacing; others at a 12″ spacing.
While you may think drip lines are best for large in-ground gardens, I’ve found them to work just as well in raised bed irrigation.
The durability, longevity, and price of drip lines make them a great option for raised bed gardens of any size. They also come with options for accessories to adapt your garden space as needed. For example, you can buy a valve that you can turn on and off, depending on whether you need to water a particular bed or not. Drip lines are extremely adaptable.
My biggest issue with drip lines came when I tried to irrigate my entire 3000-square-foot area with them, which included upward of 20 raised beds. I found that the more lines I added, the less the area seemed to get watered the further the garden space was from the irrigation source. In other words, the garden closer to the water source received more water than the garden further away. This led to uneven watering and some plants not thriving as well as others.
Still, drip lines are still a great option, depending on your needs and space.
Benefits of Drip Lines
- economical for the amount of ground they cover
- fairly easy to repair
- easy to customize and adapt to your space
- many different options: drip line, mister, one plant watering, on/off valves for rows or beds not in use, etc.
Drawbacks of Drip Lines
- uneven moisture coverage for large spaces
- easily sliced through with cultivating tools
- can get clogged with soil and debris
Drip Tape
Drip tape is a great option for irrigating raised beds. Similar to a drip line, drip tape is a 3/4″ flat tubing that contains emitters at specific intervals — usually around 10 inches. Unlike drip lines, drip tape offers even watering throughout the system. As long as you stay under 600 feet of drip line per water source, the water will disperse evenly throughout the garden.
When I installed drip tape in my raised beds, I found the process to be a bit complicated. If you’re the handy sort, you can probably figure it out better than I did, but installing it in six raised beds proved a labor-intensive task. Drip tape was also more expensive than the other options. Still, once it was installed, I could immediately tell a difference in the amount of water getting to my plants.
Benefits to Drip Tape:
- even watering — a huge benefit if you have multiple raised beds
- easier to work with once they are installed
- customizable to your garden area
Drawbacks to Drip Tape:
- complicated to set up for the average person
- can get expensive
- many parts to buy: pressure regulator, poly tubing, elbows, t’s, connectors, and caps
- longevity varies but is said to last only a few years
Garden Grid
After I had set up almost all of my raised beds with drip tape in the spring of 2022, Garden in Minutes contacted me, asking me to test out their Garden Grid irrigation system. Having not completed transitioning all of my raised beds to drip tape yet, I gladly agreed to test it out.
You can see from the video below how it worked, and I couldn’t be more pleased. The broccoli in that bed ended up thriving more than the broccoli in the bed next to it that was on drip tape, and the only main difference was the watering.
Another huge advantage was that it took me minutes, instead of hours, to assemble. The Garden Grid offered more consistent water in a system that in my opinion is fool-proof.
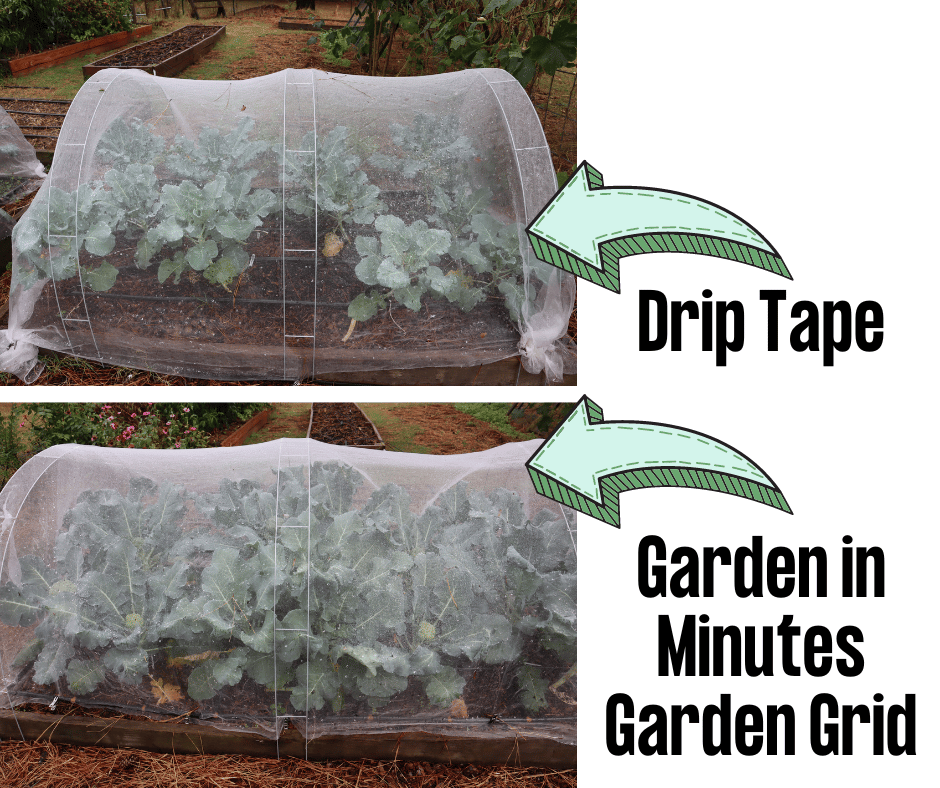
After the installation (shown in the video above), I tracked the progress of the bed with the Garden in Minutes Garden Grid compared to the bed with the drip tape. Both had broccoli growing, and the only other difference between the two was that the broccoli in the bed with drip tape was planted a week earlier.
The difference was noticeable within a week or two. The broccoli in the bed with the Garden in Minutes Garden Grid grew faster, looked healthier, and produced heads faster and bigger than the one with only drip tape. Here you can see the difference mid-season.
In fairness, I do believe that because both systems fed off the same water supply, the Garden in Minutes grid “hogged” more of the water that the drip tape would have otherwise supplied. Still, the even coverage and amount of water offered with this system proved valuable for healthy plants.
Benefits of the Garden in Minutes Garden Grid
- watering is even within the bed
- setup is easy
- it’s simple to remove when renovating the beds between crops
- the squares are 11″ apart, making this a ready-made plant spacing system
- longevity: their prototypes have been in place since 2013
Drawbacks of Garden in Minutes Garden Grid
- if placed within a system with other irrigation (like drip tape or drip lines), it provides more moisture than the others, leaving the beds watered differently (this is why my long-term goal is to switch all of my beds on one water source to the Garden Grid).
- like any ready-made solution, it’s going to be more expensive than a DIY option, but you can use my affiliate code JILL10 here to get $10 off a purchase of $100+
Best Irrigation for Raised Beds
After trying all six of these options over the past decade, you can see what I’ve found to be the pros and cons of each kind of raised bed irrigation.
But, so far, my favorite way to water my raised beds is the Garden in Minutes Garden Grid. Not only will it work easily for one bed, but it can work for multiple beds. This puts the hassle out of irrigation, so we as gardeners can focus on growing our own food.
Click here to shop Garden in Minutes.
What about you? What has your experience been in irrigating your raised bed garden?
Do you get overwhelmed with garden planning?

Subscribe here for my best tips to plan your garden in just 7 days -- all for FREE.
Plus, I'll send you my "In the Garden E-mail" on Fridays, periodic updates on garden resources relevant to you, and you'll receive access to my entire bank of free garden downloads!
You are also agreeing to our privacy policy.
Thanks Jill! So happy you’re enjoying the Garden Grid™ watering system! The broccoli growth difference is great to see. Can’t wait to garden more with you!
– Bryan @ Garden In Minutes®
I tried Oyas for the first time this past season. The are basically a clay pot you bury in the garden leaving the small opening showing at the top (they come with silicone lids to keep dirt out). By osmosis (really), if you have the correct size Oya for your bed, they provide the water the plants need—if it rains and the beds are wet, they don’t release any water which is helpful. They don’t work for starting seeds, but once the plants have established roots, the roots grow toward the Oya and they get what they need. I found them successful enough to buy 4 more large ones for my raised beds for next year. Fill with the hose each morning (or less frequently depending on the Oya size and heat patterns), I just went out with my hose (same up close personal access to see how the plants are doing), minimal leaf splashing and the water is where it needs to be to encourage deep roots (I found a four foot Basil root when I pulled them out of my beds to store in my garage for winter). That is the downside, in some climates where things freeze, they need to come in, get scrubbed off, dried and stored for winter so they don’t break. Their packaging for shipping isn’t the greatest but they replaced my two that arrived broken very quickly and without issue.
I’ve seen these but have never tried them. Thank you for sharing your experience with them! I can see where they would work well!
The Garden in Minutes grid looks neat, but a bit complicated in terms of “will it fit my existing bed?” I recently installed two 8-in-1 tall metal Birdie’s beds (which I LOVE) but my eyes glazed over when I got on the Garden in Minutes website to try to figure out how it might fit my new beds. I can see how on a rectangular bed, they could be great. But the Birdie’s beds are oval, not rectangular so I’m guessing it’s a no-go. I am so in love with these beds and plan to install more as I go. Still, it was interesting to see your review, thank you.
Hi Mary, the good news is they make grids that fit the oval raised beds. In fact, I have them in all three of mine! They are called “cornerless” because it’s the same size but without the “corner” pieces. All you have to do is select “cornerless” in the drop-down where you choose “corner options.” For my 8-in-1 Birdies bed that is roughly a 3×7 configuration (the birdies beds aren’t perfect in terms of inches), mine are the 4×7 “cornerless” design and they fit perfectly. Hopefully this helps!
I’m so happy to see your reply here on this. I bought 2 birdies tall 8 in 1s and have the same set up. I’ve been looking at the Garden In Minutes system but was unsure it would work. I’m ordering tonight based on your above reply! Thanks for the review!
We have our raised bed garden boxes waist high.. Do you have any recommendations on how to sets up an irrigation system for those? I’m trying to figure a way to irrigate 6 waist high ones plus one that is on the ground & make sure that our yard guy doesn’t mow over my irrigation system. Any advice would be appreciated.
I haven’t had personal experience with this, but I’ve seen other gardeners bury the lines and bring them up into the sides of the beds. Usually it’s a poly tubing (around 3/4″) and then the run drip tape off of that at the very minimum. Some systems are more elaborate with a shut-off valve for each bed but the whole point is to bury the line and bring it up from inside of the bed, though, you could also run it up the outside if your bed is already filled.
Jill, for your oval garden beds, what irrigation system do you use ??
I use the Garden in Minutes Grid with them, and they have an option when you order where you choose “cornerless.” It’s perfect.