• Home
  • In the Garden
  • Life & Faith
  • Nav Social Menu

    • Facebook
    • Instagram
    • Pinterest
    • Twitter
    • YouTube

The Beginner's Garden

Helping Beginners Grow a Rewarding, Successful Garden

  • Home
  • Meet Jill
  • Blog
  • The Beginner’s Garden Podcast
  • Speaking
  • Shop
  • Contact

Get Started with Home Canning

in Fruit· In the Garden· Summer Garden· The Beginner's Garden Podcast· Tomatoes· Vegetables

FacebookTwitterPinterestLinkedInEmail

(This post contains affiliate links, which means if you click through and make a purchase, I will receive a commission at no extra cost to you.)

From the outset of my first garden, I knew I wanted to pursue home canning. Since my purpose for a garden revolved around growing food for my family and cutting our grocery bill, I wanted to preserve as much of the harvest as possible. Since homegrown tastes so much better, we wanted to save as much as we could.

The problem?

I had no idea how to can, freeze, or otherwise preserve anything.

So, I had to learn from the very beginning. Thankfully, I got a copy of the Ball Blue Book of Canning and read it cover to cover. But, I also followed people online to learn more.

One of those people was Melissa K. Norris. I began listening to her podcast, the Pioneering Today Podcast, and I read many of her blog posts and tutorials. Now, canning is just part of the gardening process, and my dining room hutch brims with canned goods ready for the off-season.

If you’ve just begun your home garden, you may not have planned on what to do with the extra. You never thought you would have extra, right? But now that you do, you want to make the most of each second of time and drop of sweat you’ve poured into your home garden.

And perhaps you want to explore the possibility of home canning yourself.

On this episode of the Beginner’s Garden Podcast, Melissa K. Norris and I chat about how to get started in home canning. Make sure to check out my other interviews with Melissa about her book The Family Garden Plan and her best gardening advice. You can click below to listen or read on for the highlights.

Get Started with Home Canning — Interview with Melissa K. Norris

How to Get Started in Home Canning

Why Can?

Most of us, even if we have a small garden, harvest more than we can consume fresh. Unless you want to give it all away, you will have to decide whether to let it go bad or preserve it.

Canning gives you the option to store that excess for later use, just as do other methods such as freezing, dehydrating, and fermenting.

But canning comes with distinct advantages. You can store more than you’ll be able to with freezing. Obviously, limited freezer space is a big issue. Plus, extended power outages may leave your frozen foods vulnerable to spoilage.

And although dehydrating is a shelf-stable option that doesn’t need electricity, it does require water to re-hydrate the foods when preparing to cook. If water becomes scarce, canned foods are ready to go without needing additional water supply.

Canning v. Freezing

Vegetables that cannot be canned. No matter how much we enjoy canning, there is definitely a place for freezing. Some vegetables cannot be canned such as greens (beet greens, lettuce, chard, kale, spinach, etc.). These are best when blanched and frozen or even dehydrated.

Considerations for berries. Berries are also best frozen when preserved whole, since most of them don’t hold up to the heat in canning. But even if you’re making jams, jellies, and syrups (which you can preserve by canning) out of berries, freezing first can be a good option for two reasons. First, you can freeze them if you find yourself overwhelmed if all the harvest is coming on at once. Then, defrost them and make jellies later in the fall. Second, previously frozen berries give their juice easier than fresh.

How you use it in cooking. Another big consideration is how you will use that fruit or vegetable later. For example, consider how you normally eat green beans. If you typically eat them canned, it just makes sense to can them instead of freeze them (or vice-versa if you have the freezer space).

Water Bath Canning v. Pressure Canning

Canning is a science, and you have to follow certain rules to stay safe. These rules govern whether you can water bath or pressure can your fruits or vegetables.

Water bath canning involves immersing your sealed jars into boiling water for a set time.  You can safely water bath can foods on the pH scale that are 4.6 or lower. This is most fruit, pickled vegetables with a 1:1 vinegar to water ratio, and salsa using a tested recipe.

pressure canner dial

Pressure canning involves placing sealed jars into a pressure canner with a smaller amount of water and using pressure to bring the contents of the jars to the desired temperature. (Although it sounds more complicated, most people agree it’s quicker and easier.) Foods higher on the pH scale (4.7 or higher) must be pressure-canned. This will include all vegetables, meats, broth, and soup.

Canning Safety and Tested Recipes

Not all recipes — and not all canning methods — you find, especially online, are safe. To make sure that you are using a tested recipe, here are the sources Melissa suggests:

National Center for Home Food Preservation
Recipes from County Extension Offices (Search here for yours)
Pomona’s Pectin web site for low-sugar jams and jellies
Ball Blue Book of Canning
Ball Canning Web Site 

(For more details on the safety precautions and how to find tested recipes, Melissa explains this much more in detail in the podcast episode linked above.)

Where to Start

If you’re just beginning, start out with water bath canning. Peaches and cherries are two of the easiest fruits to can. I find tomato sauce to be the easiest vegetable to water-bath can. Click here on my post for more information on preserving tomatoes.

But if you’re like me, most of your excess may come from vegetables like beans, black-eyed peas, and corn. If you’re up for pressure canning, green beans are the easiest vegetables to start out with. Here is a tutorial from Melissa on how to can green beans. 

What Equipment Do You Need?

For water bath canning, you only need mason jars, lids and bands, and a pot. The pot needs to be deep enough to cover the mason jars by one to two inches. You can purchase a water bath canner, but you can also use a large stock pot. If you use a stock pot, though, you must place something on the bottom of the pot to ensure heat flow underneath the jars. Melissa recommends extra canning jar bands or rolled-up dish towels.

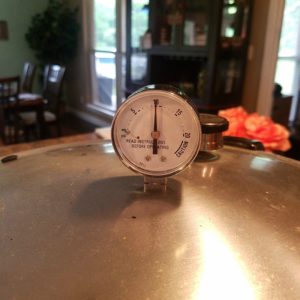
For pressure canning, you definitely need a pressure canner. This is the one I use, and I’m on my sixth season and haven’t yet even had to replace the seal. Melissa uses this brand, and though it’s more of an investment, it’s likely to be your one and only pressure canner for life.

Our recommendation: If you see yourself ever pressure canning in the future, invest in a pressure canner, as it will also double as a water bath canner.

I also recommend a canning accessory kit like this one. It makes everything easier.

Learn More

If you’re like me, you appreciate when someone will take you by the hand (even a virtual “hand”) and walk you through how to get started. Thankfully, Melissa has two ways that she can help you.

The first is a FREE webinar called the How to Stay Safe in Home Canning Master Class. Click here to register for free and watch at a time best suited for your schedule.

The second is for you if you know you want to get started canning now, and it’s Melissa’s Home Canning with Confidence E-Course. Get more information on how to can up to a year’s worth of food with Melissa’s canning techniques and recipes.


And if you haven’t yet, make sure to listen to this episode of the Beginner’s Garden Podcast in its entirety, as Melissa not only goes into canning safety but she also answers questions submitted to me by members of my free online group for beginning gardeners, the Beginner’s Garden Shortcut. (Click here to join.)

Build Your Own Trellis!

Enter your e-mail address to get a free download with step-by-step instructions on building your own garden trellis for pole beans, peas, and more!

Plus, you'll receive my "Weekly Garden E-mail" on Fridays and periodic updates on garden resources relevant to you!

You are also agreeing to our privacy policy.

Success! Now check your email to confirm your subscription. After you confirm, you will be redirected to a page where you can access your A-frame trellis download directly.

There was an error submitting your subscription. Please try again.

Powered by ConvertKit

Other Posts You Might Like:

FacebookTwitterPinterestLinkedInEmail

Filed Under: Fruit, In the Garden, Summer Garden, The Beginner's Garden Podcast, Tomatoes, Vegetables

Previous Post: « 9 Lessons Learned from the Spring Garden
Next Post: How to Plant a Fall Garden »

Reader Interactions

Leave a Reply Cancel reply

Your email address will not be published. Required fields are marked *

I accept the Terms and Conditions and the Privacy Policy * for Click to select the duration you give consent until.

This site uses Akismet to reduce spam. Learn how your comment data is processed.

Primary Sidebar

Hi! I'm Jill McSheehy and I'm so glad you stopped by! If you're a beginning gardener needing help getting started or an everyday gardener looking for new ideas, you're in the right place!

You'll find gardening articles, The Beginner's Garden Podcast, and more!

To learn more about me and follow along in my journey, visit "Meet Jill" here, and subscribe above for instant access to all of my free gardening downloads, plus my Friday e-mail full of relevant gardening tips and ideas to help you grow your best garden!

From the Shop

Learn More

Most Popular Posts

  • 7 Common Mistakes in Raised Bed Gardening
  • 3 Raised Bed Soil Mixes Compared
  • Growing Blueberries? Avoid these 4 Beginner Mistakes
  • Is Indoor Seed Starting Right For You?

Categories

Follow Me on Instagram

Notice a difference between the cabbage seedlings Notice a difference between the cabbage seedlings on the left and the ones on the right?
.
.
I just love testing different things in my garden, and for these seedlings I tested two treatments I’ve never tried before: foliage feeding and a “root dip” using the plant growth product, Organic REV.
.
.
The plants on the left were untreated; the ones on the right were treated.
.
.
A few weeks ago I filled a spray bottle with a diluted Organic REV mixture (per their instructions) and I sprayed the young seedlings on the right. They responded well and began to outpace the untreated group slightly — it was small but definitely noticeable.
.
.
Then last Friday I transferred the seedlings into these larger pots, but before I did it, for the plants on the right, I dipped the root ball in a 50/50 REV/water mixture, saturating the soil and roots before transplanting. Again, the plants on the right were the only ones that got this root dip.
.
.
The soil all plants are growing in is the same: a potting mix plus some Plant Tone organic fertilizer.
.
.
It was after this root dip and transplant that the seedlings on the right started pacing much more ahead of the ones in the untreated group.
.
.
While all the seedlings (treated and untreated) are growing in this fertile soil medium, what Organic REV is supposed to do is appearing to prove true — at least in this test. It helps plants more efficiently take up and use the nutrients that are present in the soil.
.
.
.
.
Organic REV is now a brand partner of the Beginner’s Garden. They sent me their product to try first, and I’m continuing to test it in different ways.
.
.
But what I’m sharing with you is my own experience and results. If you’re interested in their product, look them up here: @buyorganicrev Use my affiliate code JILL10 to get 10% off if you want to try it for yourself.
.
.
.
.
#organicrev #foliarfeed #foliarfeeding #indoorseedstarting #indoorseedlings #pottingup #cabbage #cabbageseedlings #organicgardening #organicfertilizers
I don’t know if I’ll ever get used to harvesti I don’t know if I’ll ever get used to harvesting from my garden in the winter. It snowed today, even! (Okay, just a dusting, and it already melted, but in central Arkansas, any snow is worth celebrating! 😂)
.
.
Although I’ve grown cabbage in the spring before, this is my first time harvesting a fall crop. (My last two attempts were thwarted by hungry rabbits or rogue hens 😡.)
.
.
I have several more plants that I’m hoping to harvest from now that the days are getting longer and maybe the heads will start growing again. And I also have a new crop started in my grow room.
.
.
Four-season gardening may sound daunting but I assure you, fall and winter gardening is almost a hands-off endeavor. The only thing it really takes is a little planning (and some nurturing in the beginning).
.
.
And the reward of picking from your garden in the winter (when your climate allows) can’t be overstated. It’s fabulous!!
.
.
If you’re interested in learning how to incorporate more seasons in your garden growing, I have several exciting new resources coming up, starting with tomorrow’s first podcast of the new year on deciding if indoor seed starting is right for you!
.
.
As much as I’m enjoying this winter harvest, I’ve already got one eye in spring! You, too? 😊
.
.
.
#cabbage #growingcabbage #wintergarden #winterharvest #zone7b #arkansasgarden #zone7gardening #gardenplanning
This fall-planted parsley 🌱 has done really wel This fall-planted parsley 🌱 has done really well in my Greenstalk Vertical planter. I recently harvested the lower leaves and dried them for use in the kitchen. But the rest of the plant is still growing well, and I expect to harvest from it for months to come.
.
.
I planted the parsley along with other plants in the Greenstalk planter in September. Although the lettuce is done and I harvested the celery, the herbs like parsley, cilantro, chives, and oregano are going strong!
.
.
I LOVE that I don’t have to buy almost all herbs from the store, even in the winter.
.
.
.
.
#herbs #parsley #herbgardening #greenstalkplanter #greenstalkverticalplanter #containergarden #containergardening #containerherbgardening #wintergarden #winterharvest #winterherbs #zone7b #zone7gardening
I’ve spent the better part of two days selecting I’ve spent the better part of two days selecting and ordering seeds for this year. My husband thinks my intensive research is a bit over the top. Maybe.... 🤔
.
.
But here’s what I do:
.
1️⃣ Select the seed companies I’ll purchase from. Most of my orders were from @southernexposureseed because I’m in the SE US and the varieties there fit my climate well. Next, I placed a large order from @territorialseedcompany (great selection, informative catalog, and some of the best prices). From there, I supplemented with seeds from @bakercreekseeds (high quality heirloom seeds, highly dependable, free shipping), @johnnys_seeds (unique varieties for different needs than I can get elsewhere), and @seed_savers_exchange (heirloom seeds with a great mission).
.
.
2️⃣ I went through my top 3 catalogs, circling varieties I was interested in.
.
.
3️⃣ I entered each variety in my Seed & Plant Research sheet from my Complete Garden Planner, noting unique characteristics, days to maturity, and price. (Not all seed packets are equal in quantity so it pays to be a savvy shopper.)
.
.
4️⃣ I chose which seeds to purchase.
.
.
I usually plan my entire garden before ordering seeds, but I was a bit nervous about the seed supply (thankfully only a few varieties were sold out), so I did my best in choosing what I’d need.
.
.
The process was LONG but a great way to spend the last two days of 2020 — with HOPE for the 2021 garden season! 💕
.
.
Have you ordered seeds yet? Where do you like to order from?
.
.
(My printable Complete Garden Planner is available in my shop, link in profile.)
.
.
#seedshopping #orderingseeds #gardenseeds #garden2021
#gardenplanning #gardenplans #seedcatalog #seedcatalogs #wheretobuyseeds #gardening #gardeningtips #gardentips
My greenhouse lettuce is coming along! 🥬 I expe My greenhouse lettuce is coming along! 🥬 I expect now that the day length ☀️ will be increasing, the growth will accelerate in the next couple of months.
.
.
I think I planted these in early October, so you can see how slow they grow this time of year, even in the warmth of the greenhouse. But it’s so nice to see signs of growth and hope for future lettuce harvests! 🥬
.
.
I’m almost to the end of my main fall lettuce, so I’ll be glad when these are ready to eat!
.
.
#lettuce #greenhouse #greenhousegardening #wintergarden #wintergardening #greenhouselettuce #falllettuce #growbag #growbags #greenhousegardener #containergardening #containergarden #containerlettuce
Would love to hear your personal experience using Would love to hear your personal experience using shredded leaves as mulch! 🍂
.
.
🌲 The trees on my property are mainly pine trees, so I’ve never had fallen leaves to collect and use as mulch. (That’s mainly why I use wood chips.) But when my dad offered to collect and bag up his leaves and give them to me, of course I said yes!
.
.
Twenty-five bags later I realized I needed to figure out how to best use them. I knew they’d blow away if I just dumped them on the garden and they’d take forever to break down if I threw them in the compost pile. So I watched a few YouTube videos and settled on a leaf shredder.
.
.
(A lot of people use lawn mowers to mulch their leaves but we don’t have a mower like that. I also tried the weed-eater as an immersion blender in a trash can idea once and it was a disaster.)
.
.
I LOVED this leaf shredder! It was really easy to use and I shredded 25 bags in just a couple of hours. Most people shred the leaves into bags but I created a simple wired bin to collect mine, and I shredded the leaves directly into it. I applied the leaves to several beds already but I have half of them still in the bin to use later.
.
.
How do you use fall leaves in your garden? I’m excited to try this method that I have enviously watched so many gardeners use over the years!
.
.
.
#leafshredder #leafmulch #leafmulching #leafmulcher #fallenleaves #autumnleaves #mulch #gardentips #fallgardening #gardenchores #compost #leavesasmulch #fallgardencleanup @worxtools
Follow on Instagram

Join Me on Facebook

Join Me on Facebook

Footer

Disclosure:

Some links on this site are affiliate links, which means I may receive a small commission if you purchase products I recommend. This does not cost you any more but does help me offset some of the costs associated with this blog. I only promote items I personally recommend and think provide benefit to my readers. Journey with Jill is a participant in the Amazon Services LLC Associates Program, an affiliate advertising program designed to provide a means for us to earn fees by linking to Amazon.com and affiliated sites.

Read my Privacy Policy, Disclaimer, and Terms of Use.

Stay Connected

  • Facebook
  • Instagram
  • Pinterest
  • Twitter
  • YouTube

Copyright © 2021 Jill McSheehy | Design by The Design Diva | Development by MRM