
Soil Blocking: Pros and Cons to Using Soil Blocks in Indoor Seed Starting
Have you seen the popular indoor seed starting method — soil blocking — where you start seeds indoors without using containers?
Perhaps you’re intrigued like I was at first, but you’re wondering: is starting seeds in soil blocks right for you?
I’ve used soil blocks in my indoor seed starting setup for a few seasons. After seeing both the ways it benefits my seedlings and the challenges that occur, I’ll help you understand the benefits and drawbacks of soil blocking to help you decide if it’s right for you.
If you’d like to listen to this discussion instead of reading, click below to listen to this episode of the Beginner’s Garden Podcast.

*links below may contain affiliate links
What is Soil Blocking?
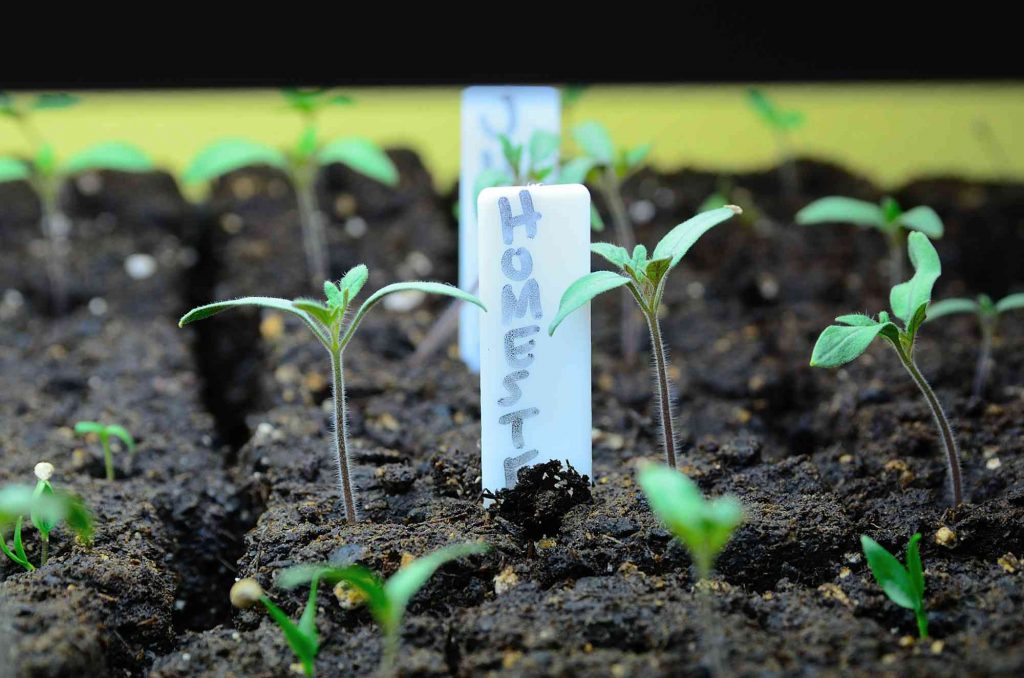
Soil blocking is an indoor seed starting method in which a soil block maker compresses a mixture of soil and water into a cube. The soil block maker also indents a small divot into the top of the soil block, to which you drop a seed. The seed remains uncovered and sprouts in place.
What is the purpose of blocking seedlings before transplanting?
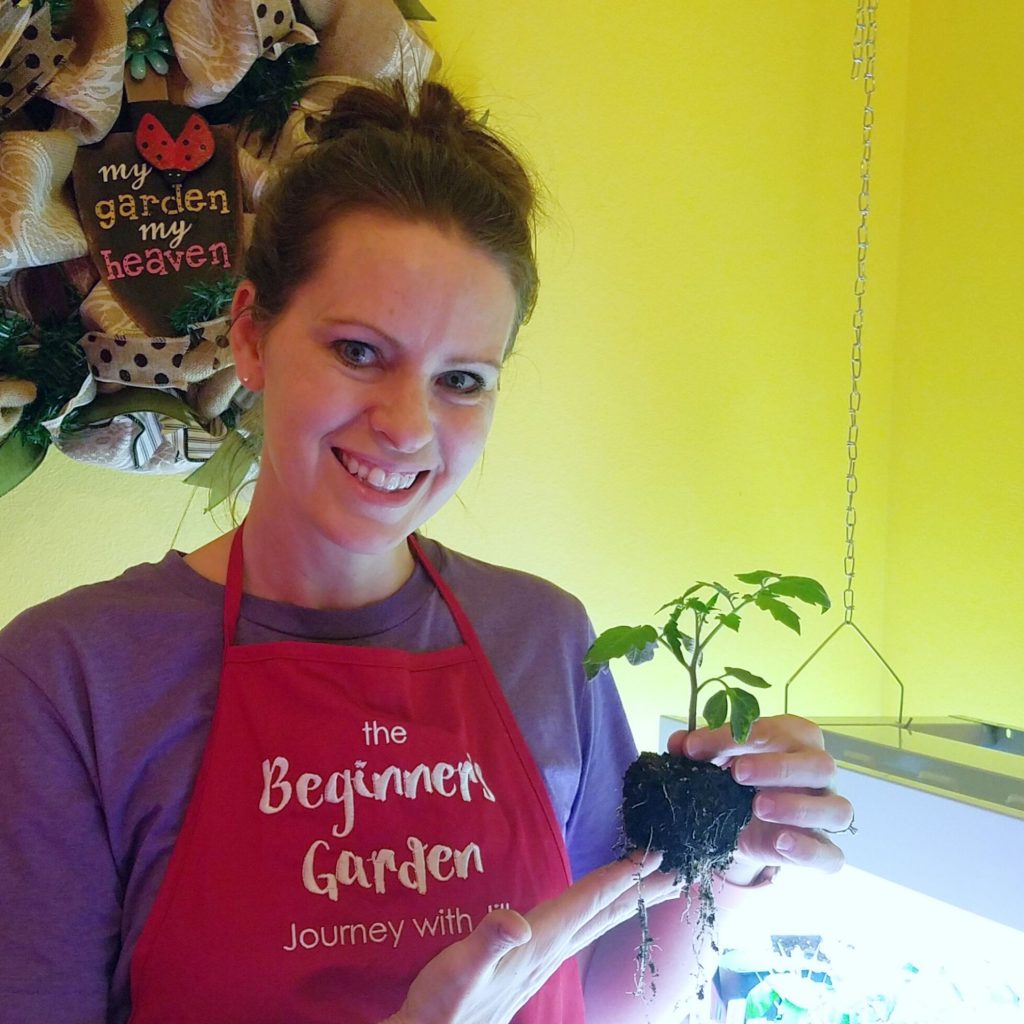
While there are many benefits to soil blocking (see below), the primary purpose of blocking seedlings before transplanting is to prevent roots from encircling the container during growth. Instead, the roots pause at the edges of the blocks, awaiting transplant into a larger soil medium. When transplanted into the garden (or a container), soil blocks reduce the trauma to roots at transplant time, resulting in a healthier seedling and plant.
Benefits of Soil Blocks
After using soil blocks for a few seasons, I can personally attest to the major benefits of soil blocking.
Healthier root system.
In a contained environment, roots begin to encircle the growing container in search of water and nutrients. When seedlings become “root-bound” in this way, they struggle to acclimate to garden soil at transplant. In a soil block, the roots retain their vigor without the stunting that can occur in a confined container.
Lack of transplant shock
Seedlings quickly acclimate to the garden soil once transplanted. Compared to transplanting a root-bound seedling they start out healthier and grow faster. Seedlings grown in a traditional container often, following transplant, appear stunted for a short time. They must “heal” from the wounding of the roots and the trauma of the transplant. Only then can they resume growth.
When transplanted at the proper time, the roots escape wounding and the plants avoid trauma normally associated with transplanting. The seedlings enter the ground, ready to adjust to their new space.
In my experience, even seedlings of the most sensitive plants (like squash and its cousins) easily transplant into the garden space. Until I began using seed blocks, I avoided starting my squash, cucumbers, and melons indoors because of their unpredictability at transplant. Although these plants are still prime candidates for direct sowing, I enjoy that I can get a head start on these plants indoors.
Ability to start more seeds indoors
Because of the way soil blocks reduce transplant shock, seeds that normally balk at being transplanted (and often don’t survive it), can be started indoors more easily. As mentioned above, as long as fast-growing seedlings like squash, zucchini, cucumbers, and melons are started at the right time (about 3 weeks before transplant), they can get out in the garden faster for an earlier harvest.
Root crops are another option for indoor seed starting when using soil blocks. Beets and carrots — normally best sown directly in the garden — can be started early (using the micro soil-blocker) and transplanted shortly after germination.
Ease of transplant in the garden
This may be my favorite benefit to soil blocks. When it comes time to transplant, transplanting soil blocked seedlings takes a fraction of the time that transplanting from containers does. It’s actually enjoyable!
You don’t have to worry about prying the seedling from the container, risking injury to the delicate stem. You don’t spend hours transplanting dozens of seedlings — straining your back and knees in the process! — because transplanting seedlings in soil blocks is so quick and easy!
Reduced use of plastic containers
For those wanting to lessen their use of plastic in indoor seed starting, soil blocks provide a promising alternative. There’s no need to purchase seed starting containers each year or sterilize re-used ones.
Drawbacks of Soil Blocks
Starting seeds in soil blocks sounds pretty awesome, right? Well, like most endeavors, this method of seed starting also comes with drawbacks. Thankfully, none of these are insurmountable, but it’s good to be aware of the potential issues so you can prepare to mitigate them early.
Initial Cost
Purchasing a soil blocker does carry a one-time cost, but in my experience it pays off in the long-run. Not only will you save money with a decreased need for containers, but you will also reap dividends in healthier plants with better harvests.
If you love the most common “mini” soil block maker, you may want to venture into other sizes, such as the micro blocker and the maxi blocker. Of course, those costs definitely add up.
Mold
I’ve found myself fighting against mold on my soil blocks more than with seeds planted in a traditional way. Because of the high percentage of peat moss in soil blocks, it is imperative you do not allow the soil blocks to dry out. Not only will this stress the plant, but rehydrating the blocks can be more challenging than using regular potting soil in a traditional container.
Therefore, when you keep the blocks moist, you also invite mold to form on top of the blocks. To counteract this issue, a dusting of cinnamon usually keeps the mold in check.
Mold on soil blocks presents more than an unsightly appearance. It stunts the growth of delicate seedlings and inhibits the growth of newly-germinated plants. If you do notice mold growing on your soil blocks, scale back on watering (watering only from the bottom) and dust the top with cinnamon until you can get it under control. (More on watering below.)
Not all plants can stay in the soil blocks until transplant in the garden
Plants such as tomatoes will need to be “potted up” into a larger container prior to transplanting in the garden. While this was a drawback for me at first (I was hoping to skip containers altogether), I found the soil blocks to be very convenient to “pot up” into larger containers. And when I did transplant them into a larger pot, the plants skipped transplant shock and surged in growth.

What supplies do you need for soil blocking?
Starting seeds indoors using soil blocks actually is pretty fuss-free when it comes to supplies required.
Soil Block Maker
The primary soil blocking tool is the soil block maker. This easy-to-use tool compresses the soil blend tightly enough that the soil stays in a structured cube for the duration of a seedling’s growth. The soil block maker is the key component in soil blocking; I haven’t found a way to plant in true soil blocks without it.

Soil Block Mix
Most experienced gardeners and soil blocking purists use Eliot Coleman’s Soil Block recipe. A legendary market gardener and highly-respected in his field, Coleman was the pioneer of this method of seed starting. His soil block recipe — as shared in his book The New Organic Grower — combines ingredients such as peat moss, lime, sand or perlite, organic fertilizer, compost, and topsoil:
Basic Soil Block Recipe (by Eliot Coleman)
- 30 parts brown peat
- 1/8 part lime
- 20 parts coarse sand or perlite
- 3/4 part base fertilizer (like this one)
- 10 parts soil
- 20 parts compost
(Coleman also recommends a different blend for the micro-blocker. If you’re using his mixture, he gives more detailed instructions in his book, which I recommend, not only for the recipe but also for the general organic growing principles; it’s a must-have for organic gardeners.)
Is Eliot Coleman’s Soil Block Recipe the Best Solution for the Home Gardener?
I have used Coleman’s recipe but found it cumbersome to obtain all the ingredients, especially if you’re not making a huge amount. Usually bought in bulk, these ingredients can get expensive, and for most small-scale home gardeners, it will prove unnecessary to have that much volume for your seed-starting requirements.
Soil Block Recipe Alternative for Home Gardeners
As an alternative to Eliot Coleman’s soil block recipe, I use a 50/50 combination of a high-quality organic potting mix and peat moss. I’ve found this combination works great for the compression necessary in the soil blocks. Plus, the organic nutrients present in this potting soil feeds the seedling until transplant — just like Coleman’s mix does. I have used other potting soil but found this Fox and Farms Potting Mix to yield the best results for me.

Shallow Trays
Once you press your soil blocks, you’ll need a place to put them. Shallow trays with rims allow you to water from the bottom, which is critical for soil-blocked seedlings (keep reading for watering tips).
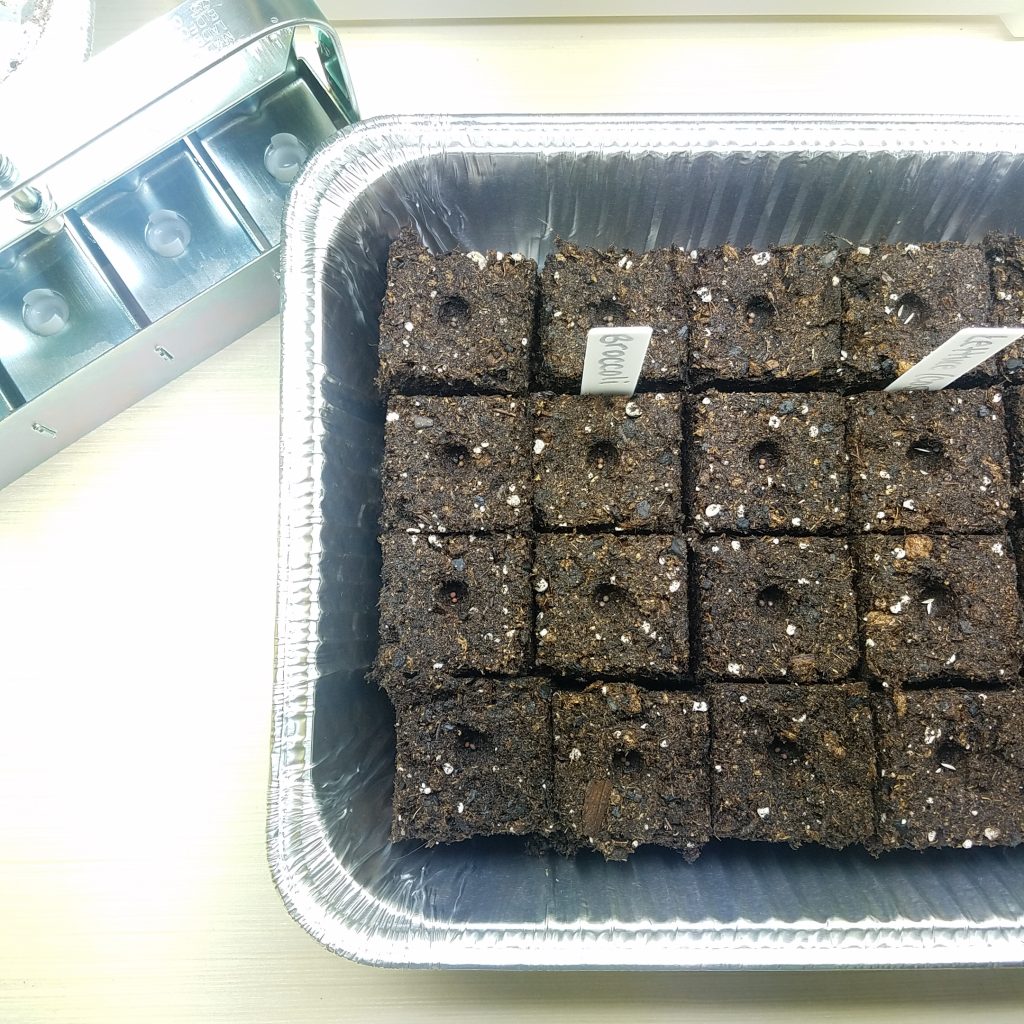
You can use a large baking sheet for a large number of the same kind of seedlings, like tomatoes or broccoli. You will also need a cover of some type, such as plastic wrap, to cover the blocks prior to germination.
Another option is to re-use plastic containers like clam-shell salad containers. This is handy if you start a variety of different kinds of plants that may need varying degrees of light, water, and indoor growing period. Plus, the lids create the greenhouse effect you need prior to germination.

Can you use potting mix to start seeds in soil blocks?
Potting mix alone in soil blocks will not allow for the compaction and structure that the soil blocking method requires. That’s why you will need to use a custom mix as outlined above.
How do I start my own seed soil?
You have two options. If you want to use Eliot Coleman’s Seed Block recipe, mix the ingredients in the order listed (one after the other), in small batches. If you want to use the 50/50 blend I use, simply mix peat moss with the organic potting soil in small batches.
I recommend you blend small batches in a plastic tote with a lid. Because of the amount of peat moss in both mixture options, particles easily blow around. First, it’s not fun to breathe. Second, you risk wasting the ingredients as they blow away from the mixing area. If you mix the blend indoors, turn off any ceiling fans and close any windows. If you mix the blend outdoors, choose a day without wind, or mix in a sheltered location like a garage.
(One exception: if you plan to use all of the mixture right away, you could moisten the mix while blending to help keep the ingredients in place.)
Keep your dry soil block mix sealed until you’re ready to begin creating your soil blocks.
How to Prepare Soil Block Mix for Planting
Keep your soil block mix dry and covered until you’re ready to begin sowing seeds. A couple of hours ahead of planting, transfer the desired amount of soil block mix into a large bowl. Use a bowl with a flat bottom that’s at least the width of your soil block maker. Then add water and mix until the consistency resembles brownie batter.
You want your soil very wet — you will need more water than you think. Peat moss is highly absorbent and mixing thoroughly is key. When the mixture no longer takes in water and the water just begins to pool in places, you can stop adding water.
Ideally, let the mixture sit for a few hours to continue to absorb. This step is helpful for even absorption but not required if you didn’t plan ahead.
(For a demonstration of the process of making and planting in soil blocks, view the video below. Continue reading and I explain each step more thoroughly.)
How to Make Soil Blocks with a Soil Block Maker
Once your soil block mix is thoroughly saturated and in a bowl, I recommend putting on latex gloves before starting. Not only is soil blocking a bit messy, but peat moss can irritate, scratch, or even get lodged your skin like a splinter.
(I don’t recommend garden gloves for this. First, you’ll want the dexterity of latex gloves. Second, your hands will get caked with wet soil. Save your garden gloves for the garden.)
From here, take your soil block maker and press it down into the soil block mix. Pick it up and do this again, until no more soil will go into the blocks. At this point, I tilt my soil block and press more mixture into the blocks with my hands, pressing until water seeps out. The more compact you can get the blocks, the better of a structure you’ll have.
Once the blocks are as full as you can get them, place the soil block maker into the tray you’re using. Press the handle down and lift the soil block maker as it deposits the blocks into the tray.
Planting Seeds into Soil Blocks
After you have made your soil blocks, you will want to plant your seeds. Each block will contain an indentation at the top. The seed will go here. Assuming a 100% germination rate, only one seed is needed per block. But since my seeds don’t always germinate at 100%, I usually plant two seeds per soil block.
This may seem counter-intuitive when you think about planting seeds, but you do not need to cover the seeds with more soil. As long as each seed nestles into the bottom of the indention, viable seed will germinate. Sometimes I use the eraser end of a pencil to gently press tiny seeds into place.
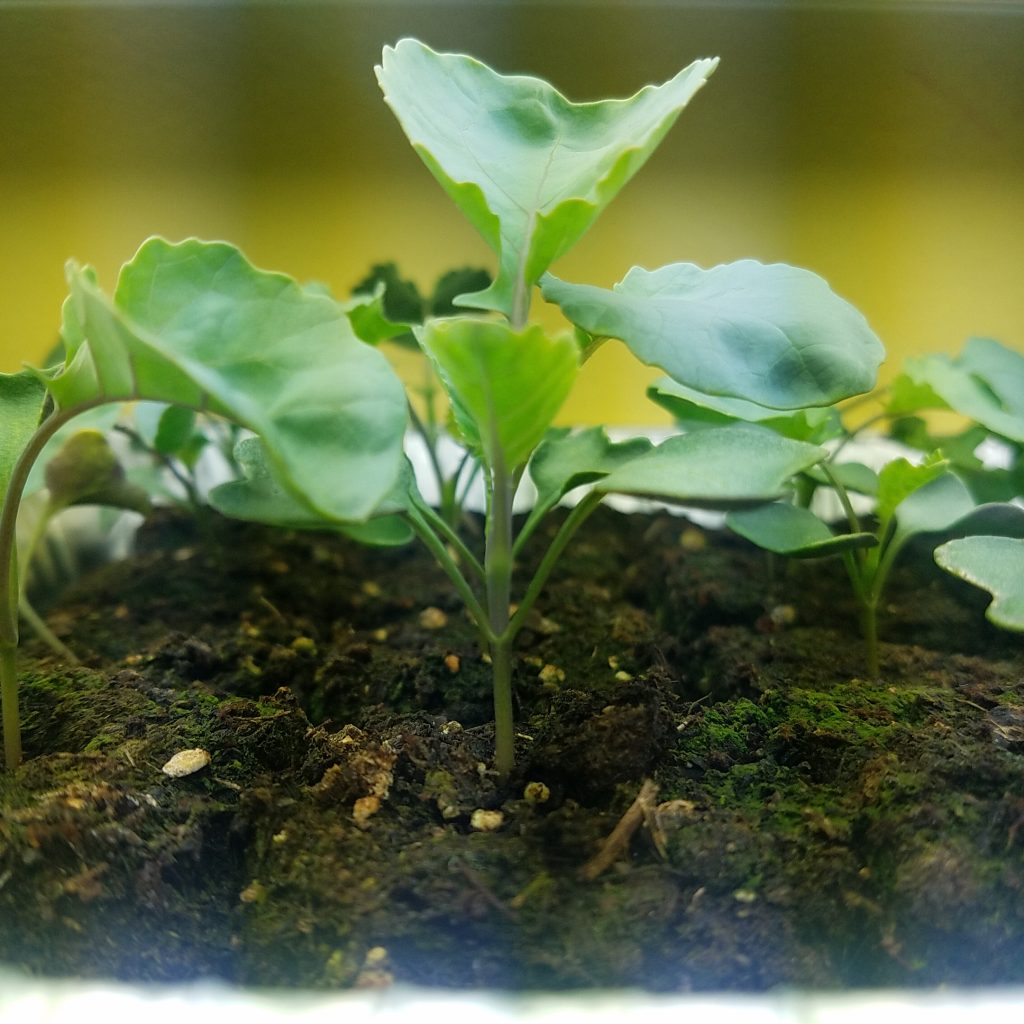
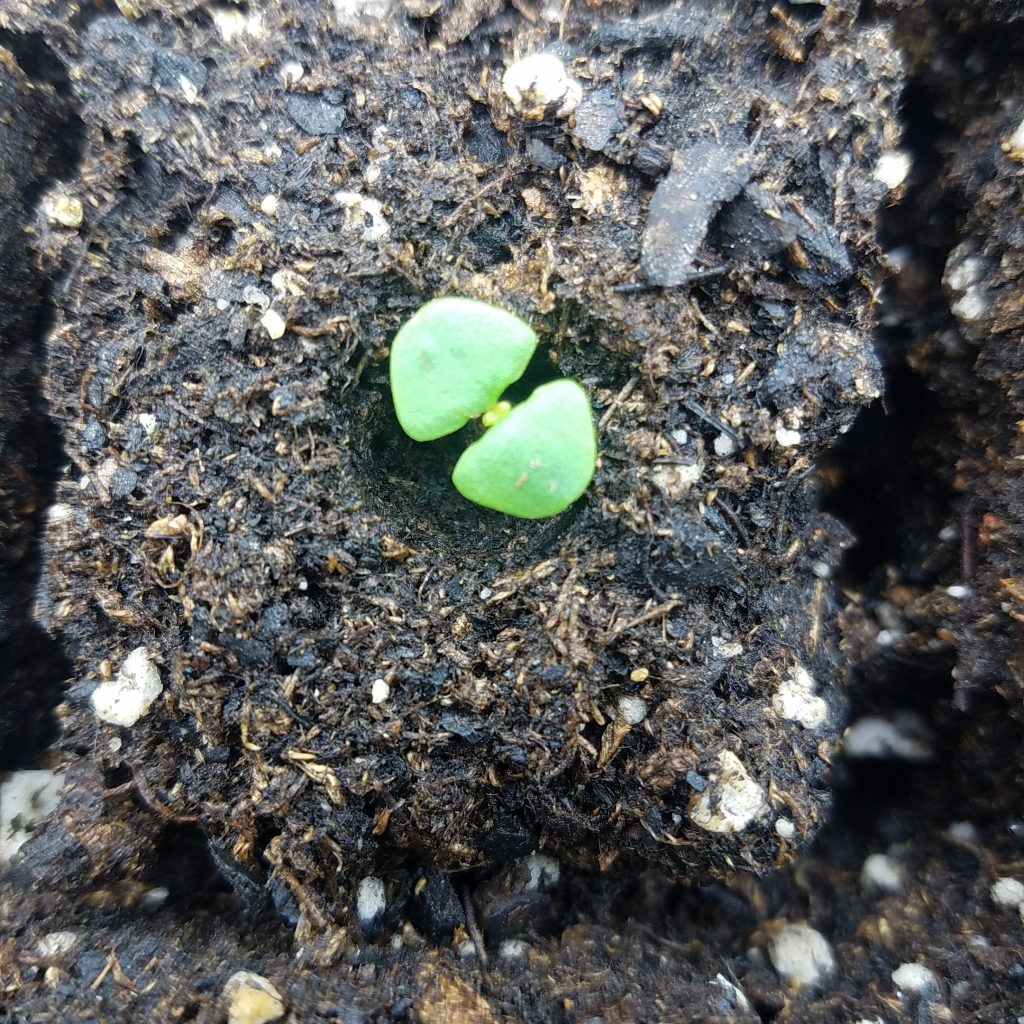
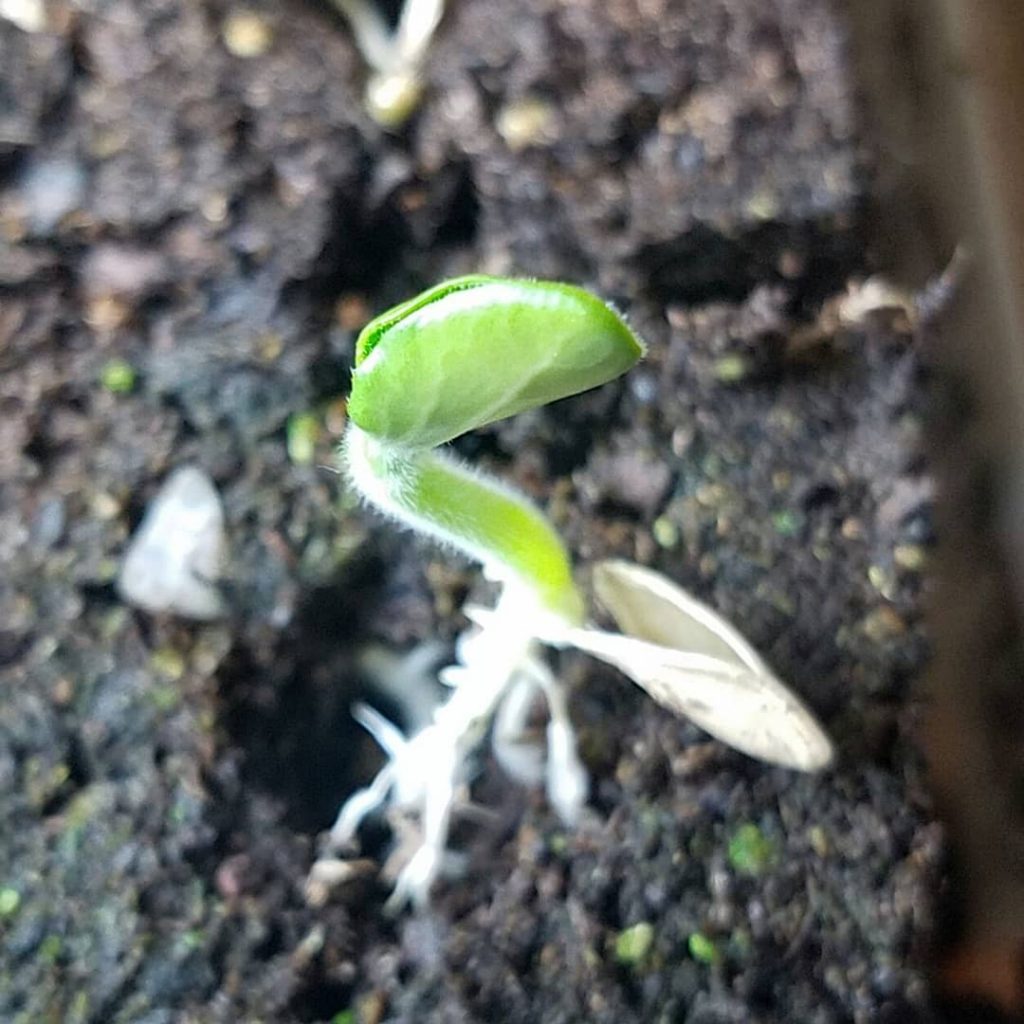
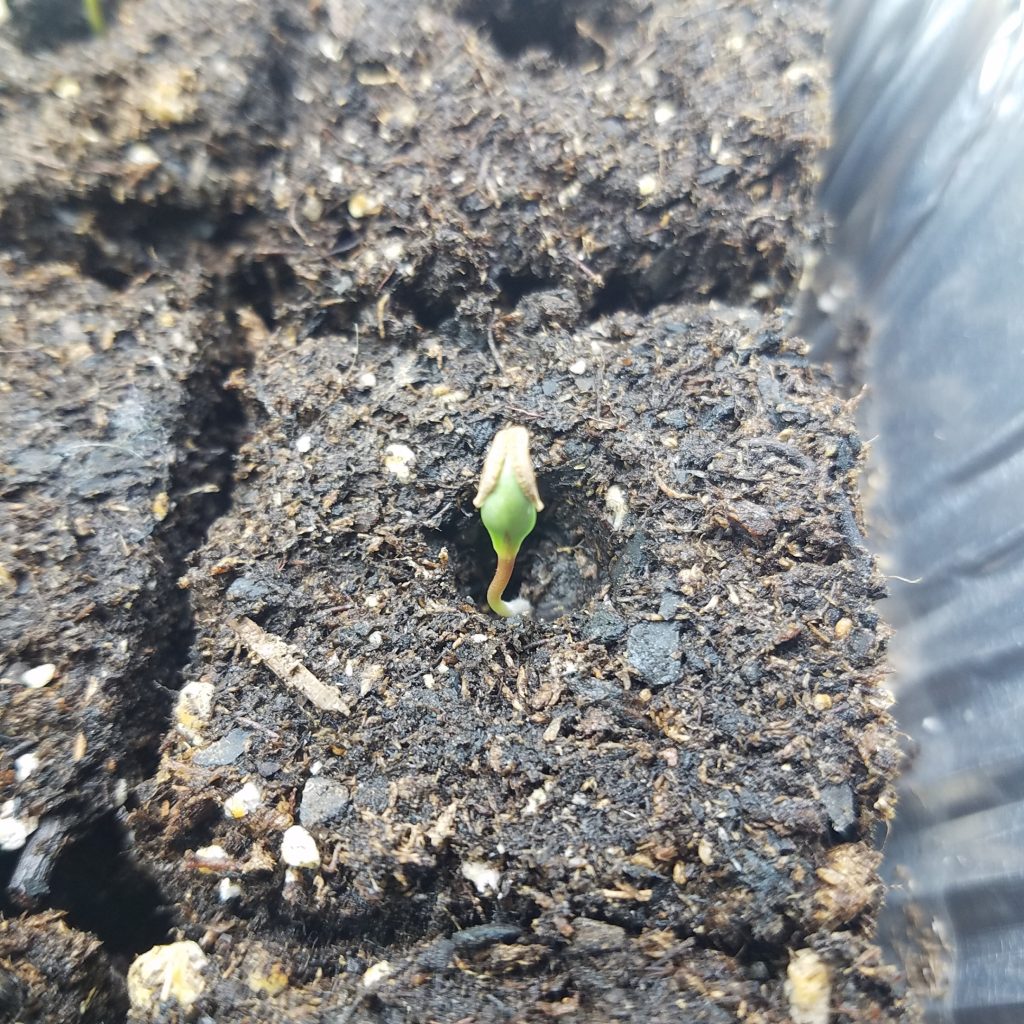
The beauty of planting seeds in soil blocks is being able to watch the germination process that normally happens unseen. It’s a beautiful way to observe the miracle of a new seedling’s life.
If you planted more than one seed per block, and all seeds germinated, you will need to snip the extra seed(s) at soil level as soon as you can identify the strongest seedling, or even sooner. Never pull out the extra seedling from the root, as it will disturb the growing root system of the one you want to keep. I usually cull extra seedlings when the sprouts are one half inch tall and the first sprouting leaves (cotyledons) fully open.

When the seedlings emerge, immediately remove the plastic wrap or dome and place 2-4″ under grow lights.
Watering Soil Blocks
The biggest mistakes I’ve made with soil blocking have been in my watering practices.
Watering Soil Blocks from the Top
Although soil blocks are strong, they aren’t entirely resistant to collapse. That’s why you never want to water from above with a strong stream of water, even from a small-spouted watering can. The only time you might need to add water from above is when the seedling has just sprouted. In this case, use a fine mist sprayer to mist the top of the blocks to keep them from drying out. However, I’ve found that if your soil blocks were saturated enough to begin with, and you used a clamshell container or plastic wrap, enough moisture will stay in the blocks until you begin watering from the bottom.
Another reason you don’t want to water soil blocks from the top — particularly with a stream of water — is this will dislodge a sprouted seedling trying to grow roots. Because that seed doesn’t benefit from the stability of soil all around it, it needs to be left alone until it can anchor itself with deep roots.
If you do notice the soil block drying out while the seedling remains small (less than 1/2″ tall), use a fine mist sprayer to moisten the blocks.
Watering Soil Blocks from the Bottom
From the time a seedling reaches about 1/2″ in height, you want to water from the bottom only. Capillary action in the soil will bring the water from the bottom of the seed block to the top. You can watch this fascinating phenomenon with soil blocks, as the color of the soil changes from light to dark as the water rises in the blocks.
Only add enough water to the bottom of your soil block tray that the blocks will absorb. You never want your blocks sitting in water. This can cause root rot and will exacerbate mold. If you add too much, remove extra water with a turkey baster or medicine dropper.
How Often to Water Soil Blocks
New seedlings will require little water. Remember, the soil blocks contained a high quantity of water to begin with. Check them every few days, but likely, you may only add supplemental water once a week.
Once seedlings begin growing their true leaves, the growing roots will require more frequent watering. Use the same guide as listed above; add only enough water the soil blocks can absorb. But you may find yourself watering every couple of days instead of weekly.
When to Transplant Soil Block Seedlings
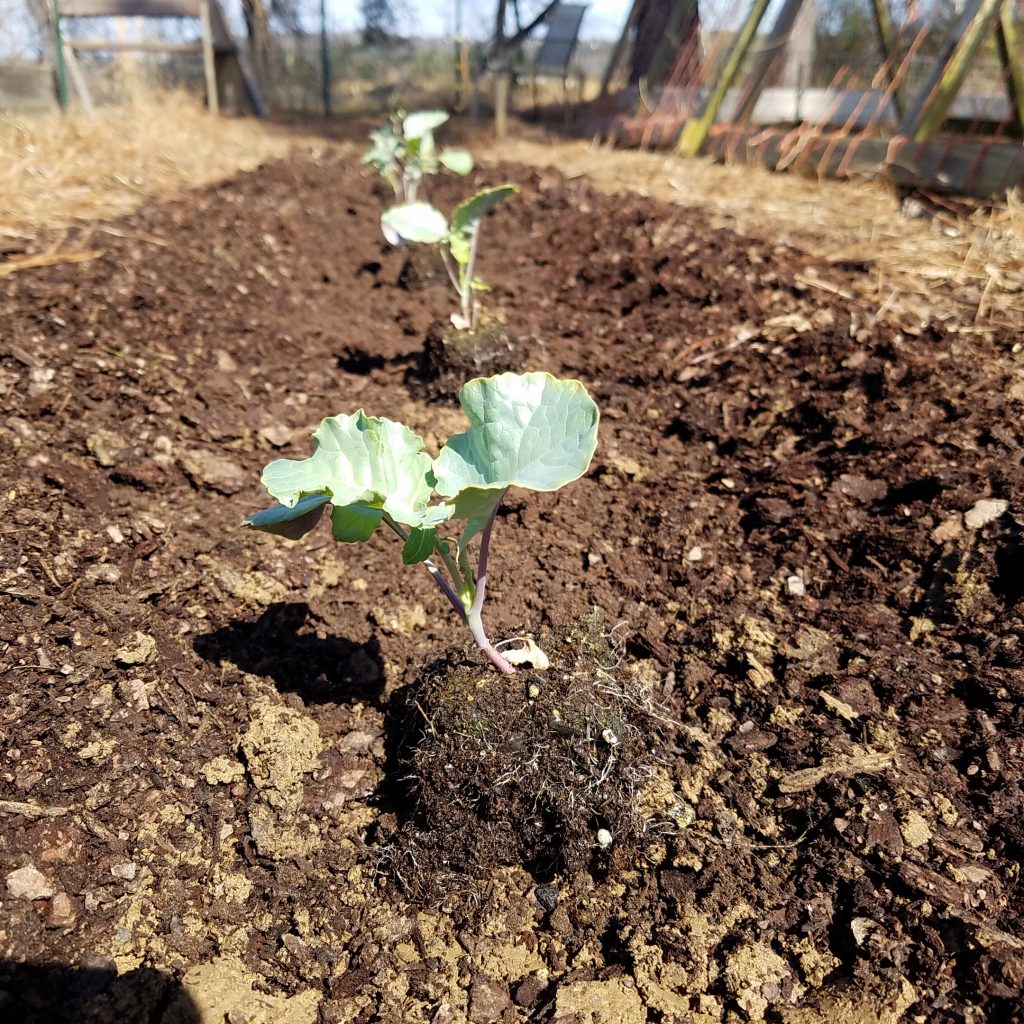
Plants like lettuce, cabbage, broccoli, squash, cucumbers, and melons can be transplanted into the garden when they have several sets of true leaves and when the outside garden conditions allow for it. Be sure to harden off all plants (place them outside for small amounts of time for a week, increasing the time each day) before planting them outside.
Plants like tomatoes and peppers will likely need to be transplanted into larger containers before they can go outdoors. (If you grow peppers in the maxi soil blocker, they probably will not require potting up). The best way to know when tomatoes and peppers need more space is when you see their roots growing out at the bottom of the soil blocks. Also, when their height doubles the height of the soil block, you need to consider potting up.
Soil Block Maker Sizes
Have you decided that soil blocking is right for you? If so, I think you’ll be so glad you did it! For most of us, we never go back to seed starting in containers.
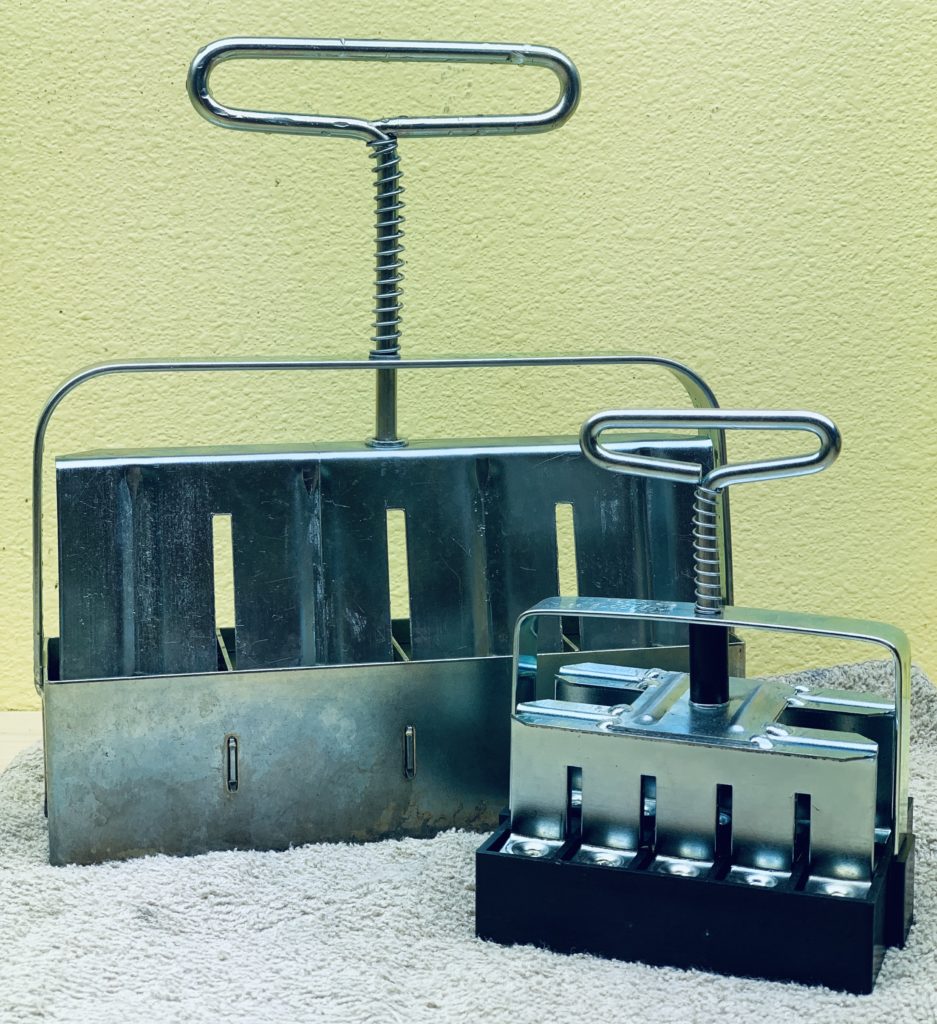
But before you obtain your first soil blocker, you need to choose which size. The mini, micro, and maxi sizes each serve different purposes in indoor seed starting.
Mini Soil Block
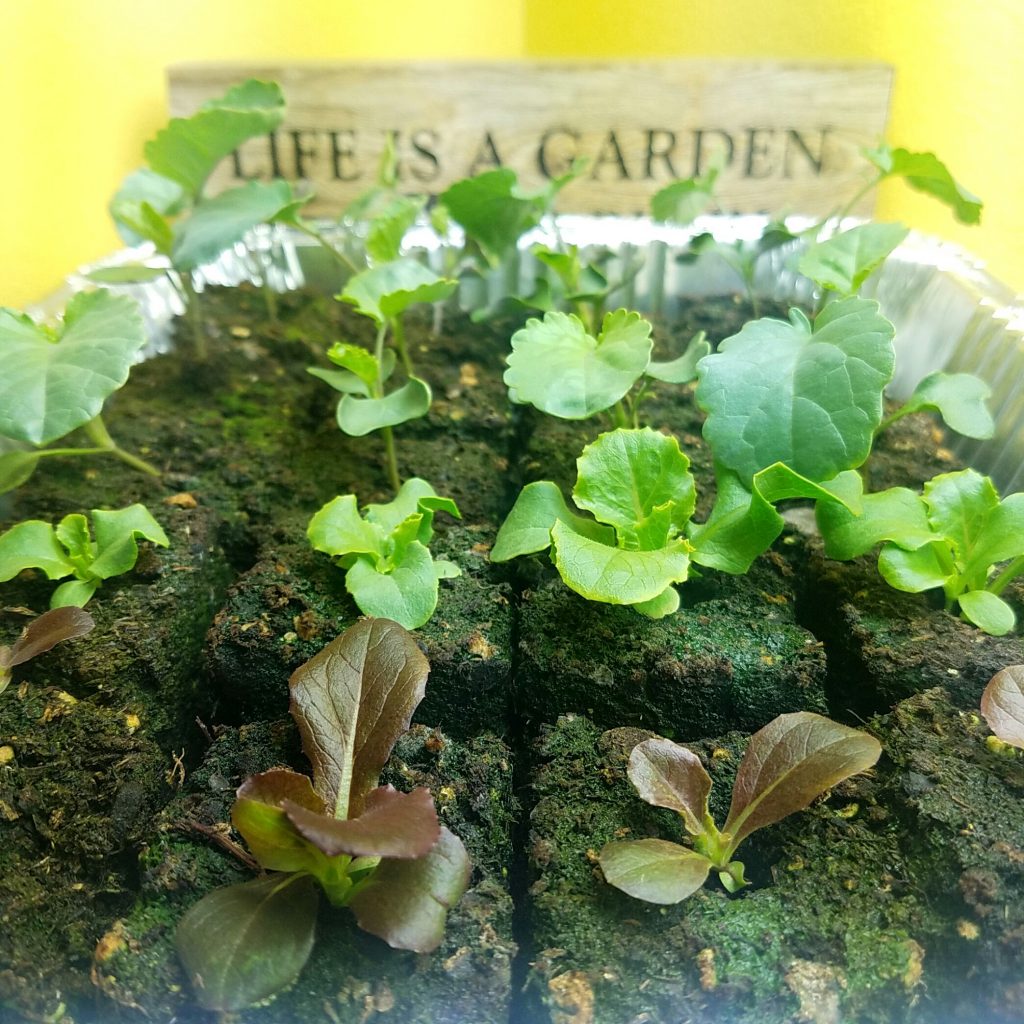
The most common soil block size — and the one I use the most — is the mini soil blocker. Making four, two-inch cubes, the mini soil block is perfect for starting almost every seed indoors. When I start lettuce, squash, cabbage, broccoli, and melons, I start them in the mini soil block and transplant them directly into the garden.
The mini soil block can also be used for tomatoes and peppers, but I always have to “pot up” these plants into a larger container before they can be transplanted into the garden.
If you want to give soil blocking a try, start with the mini soil block maker.
Micro Soil Block
The micro soil blocker creates twenty, 3/4-inch cubes. Perfect for starting a large volume of seeds, most seeds started in the micro soil blocker will need to be “potted up” into a larger container shortly after germination. If you own the maxi soil blocker (see below), you can nest the micro soil blocks in the maxi soil blocks for an easy way to “pot up” without using containers.
Another benefit to the micro soil block is less seed and soil waste. If a seed doesn’t germinate, you don’t lose as much soil in that “block.”

Micro blocks are also perfect to start slow-to-germinate seeds in a controlled environment — like carrots and beets — and promptly transplant them into the garden upon germination. Personally, I’ve found this very helpful for growing beets. Carrots may or may not be worth it, though. If you’ve had challenges with carrots germinating in the garden, this might be a method to try. I tried it once and it worked well; I transplanted the sprouted carrots in the garden right away, but I found the process to be much more tedious than direct sowing.
Maxi Soil Blocker
The maxi soil blocker creates one four-inch soil block. As mentioned above, freshly-germinated seedlings from the micro soil blocker can be nested into the soil blocks created from the maxi soil blocker. This eliminates “potting up” into a container.
Maxi soil blockers are perfect to use with plants like peppers, where they require more space indoors than a mini soil blocker provides. Using the maxi soil blocker for these plants eliminates the need of potting these plants up prior to transplanting into the garden.
Is Soil Blocking Right For You?
Gardening trends can be found everywhere you look. But I think soil blocking is here to stay. Many of us have found the benefits outweigh the drawbacks by a longshot. We enjoy the ease of transplanting, and we’ve seen the difference in the health of our seedlings.
If you’re ready to jump on board, or if you’ve already started your journey to soil blocking, I’d love to hear your experience. Comment below!
Seed Starting Quick Reference Guide
Which seeds should you start indoors? Which should you wait to plant directly in the garden? When? And in what soil temperatures do certain seeds germinate better? Grab this one-page quick reference guide to get your seeds sprouting and your plants growing strong!
Plus, I'll send you my "In the Garden E-mail" on Fridays, periodic updates on garden resources relevant to you, and get access to my entire bank of free garden downloads!
You are also agreeing to our privacy policy.
I used soil blocks last year for the first time. Loved it. Can you clarify about using the pre mixed bag of soil from amazon- would I need to add anything to the mix or just use that without adding anything?
Yes, I mixed the potting mix with peat moss — half of each. I had happened to come across a YouTube video where a small market farm was using that method, and since it seemed easier than the “official” mix, I thought I’d try it. I’ve used two different potting mixes (both organic) and both worked, but I saw a bit better results in the one I linked to above.
The link did not work. What is the name of the one that works better? Thanks.
Here is the potting soil I used. (I corrected the link above as well, thank you.) https://amzn.to/3c5rRIW
I want to try the soil block maker but I have been saving eggshells all winter to fill with soil and germinate in. So I will try the eggshells first. I have saved the plastic containers the eggs come in so I don’t need to cover with a plastic sheet when I place the clamshell container filled with eggshell starter units on the warming mat. Do you see any problems I might have with this method? I am going to germinate some peppers, squash, beets.
I personally have never planted in eggshells, but I know plenty of people do. The main concern is the limited soil space for the roots to expand, which means you’ll need to transplant sooner than if you were to use soil blocks or other larger containers. Peppers take longer to germinate than the other options you listed, and I think they’d be most ideal for your method. Squash germinates rapidly and requires transplant rapidly as well, as they don’t take to being moved. Beets should germinate fairly rapidly, and because they’re a root crop, you should be prepared to transplant pretty quickly after germination. However, compared to the micro soil blocks (which I use for beets), you should have more time with them in the eggshells than I do with my micro blocks.
Greeting, Does the mix peat moss with the organic potting soil mix you use include any other ingredients (ie perlite, fertilizer, lime) or just those two?
Thanks for the great article, Bruce
I just looked at the ingredients on the bag I have, and the potting soil includes aged forest products, peat moss, perlite, and an organic fertilizer blend. The potting mix is a pH of 6.3-6.8 according to the package, so perhaps lime was included, but it didn’t list it from what I could tell. I didn’t add lime to my soil blocks using this mixture.
Hi, thanks for the the great read. I have started germinating a lot of herbs in micro blocks and soon peppers and tomatoes in 2inch-4inch soil blocks to sell as starts at the farmers market. I have not sold starts before at market, only veggies so I haven’t cared for huge amounts of soil blocks prior to taking them to market. My issue is I have alot of soil blocks so how do I store them outside in feb-may before the spring summer market opens and what would be the best and cheapest containers to move them around in? Is it necessary to water them from the bottom? I’m wandering how an outside giant cloche would work and what they can rest on or be watered on. If they do need to be bottom watered then perhaps I have to build a tray without drainage, out of plywood maybe and lay plastic over that. And I’m wandering about the ease of transporting them to the market for peoole? What are big tray ideas. I have very limited funds and not alot of scrap stuff letting around. Any feedback would be appreciated 🙂
I know a lot of serious soil-block growers make elaborate set-ups especially for ease of watering. I personally prefer to keep it simple, at least for now, so I hear you. This year I am using a repurposed cake container, with the “dome” actually upside down and I am setting my blocks inside it. It’s a bit flimsy but since it isn’t too large, with care it’s easy to transport. I also use old cake pans and repurposed salad and to-go containers. I don’t personally “store” my blocks outside early in the year; the plants grow under lights inside; I only take them outside to harden them off. Regarding watering — I do sometimes top-water, but in my experience, the stream of water dislodges the blocks somewhat and the soil can break down from one block to another. That’s why I bottom water as much as possible. Regarding transporting and selling the blocks at a farmer’s market, I think your best bet is to put those blocks (plants) into a cup of some kind (like a paper cup), just strong enough for the block not to fall apart either for you or for the customer as they transport it home.
I’ve seen stuff on line where folks growing in garage, or in cold frame, just puts the blocks on flat boards. In the garage, he put a cotton fabric under them, with a long bit hanging off the end. The loose end he put in a container of water. this way the blocks got watered via natural wicking. Of course, over time, the fabric will rot. Transporting on boards wouldnt be so easy. better for onsite use I imagine. A local farmer at our market used wooden crates (could build them yourself from scrap or old, non chem treated pallets). They work great. Others use cookie sheets, though I don’t feel their seedlings are as robust. I don’t feel the constant metal contact is good for soil or plants or water. Best wishes.. I loved getting starts at the market with blocks as I could get the number I wanted, not limited to the 4 or 6 pack amount. And the plants took off so much better, and no plastic waste. Yahoo! Now I’m set up with my own blockers and lights and start seeds indoors. Love the soil blockers. Happy plants and happy gardener.
What types of melons do you start in the mini soil blocks? You put them straight in the garden once they begin to sprout (melons and squash)?
I started watermelons, cantaloupes, and honeydew melons. Once they formed 1-2 sets of their true leaves, they needed to go out in the garden. (This year we’ve had a cold spring so I had to transfer the into pots first, but ideally, the soil block would go directly in the garden.)
Thank you, this was very informative! When transplanting the new plants into the outdoor garden does the soil in the out side beds need to contain the same mix as in the soil-blockers?
No, not at all! I plant mine in the ground, raised beds, or containers — it doesn’t matter.
Hi! I just got my mini soil blocker and am excited to start some seedlings for early spring planting. I’m trying to figure out an approximate amount of soil I’ll need to buy…do you have an estimate of how much soil mix the mini blocker uses (per 4 blocks)? Thanks ?
Hmm… I would only be guessing here. Maybe around 2 cups per mini blocker? The last time I did soil blocks, a large mixing bowl (approximately holding 4 quarts of soil if I’m estimating right) gave me about 7 mini blocks (or 28 blocks) of soil, give or take.
love your page! I am looking at using soil blocks for the first time this year. I have roots 707 organic soil I planned on using. would I still need to add peat to it? what about anything else?
I don’t know what kind of potting soil that is. If it has a high amount of peat in it already, you probably could just use it without the peat. That’s how I use ProMix. But if it’s a higher amount of other materials, you may need to add peat. Just not sure since I haven’t used it before.
This is a very clear (and helpful) explanation of soil blocks. I am looking forward to trying the alternative “block mixes” mentioned here (mine were too compressed and delicate roots had trouble).
I set the 2″ soil blocks in inexpensive plastic paint roller trays. With a folded newspaper below the blocks, it was easy to keep blocks watered through the capillary absorption of the 5 layers of newspaper. (never removed from grow lights until hardening off outside). The trays go in the dishwasher for re-use (works well with mini-blocks too). For some reason, the newspaper helped to control mold. Is there a reference to your preferred grow light?
Great suggestion, thank you! The grow lights I use are listed here: https://www.amazon.com/shop/thebeginnersgarden?listId=1V9MLUFIEV9D7
I’ve been having uneven germination success with soil blocks. I use the Coleman mix. Sometimes the same seed from the same package grows well, and another time it doesn’t. Some plants have grown really well and others have not for no obvious reason. Narrowing it down through experimentation I wonder if the soil mix can be too wet when blocking forming a block that is too compact for germination. I’m also wondering if vermicompost is too dense to use for block making. Do you have any ideas what could be wrong?
I have only noticed that with peppers. The others, like tomatoes, are fairly even. I do wonder if it has to do with their long germination time and the issue of maintaining even moisture without mold forming. I’m not sure about vermicompost, as I’ve never used it before. But I haven’t found the blocks to be too compact for plants, so I’m thinking it could be a moisture retention issue. It may help to experiment with a different mix and see if you notice a difference.
Hi Jill,
First of all I love your posts! When I see you sharing on a topic I’m researching I always find exactly what I’m looking for. Someday we’ll have to meet! lol
I have the micro and mini soil blockers. I used them a few years ago and got away from them. Mostly because I started growing plants to donate/sell to a local organization for their plant sales (they required plastic pots) then I started having my own sales. Not growing for the group this spring so I’m going to sell my plants in the soil blocks. I’ve ready this is common practice in Europe. Also loved the reply above that mentioned she likes to get them in the blocks at her farmers market.
Keep sharing! Love reading about your experiences and what you learn as you grow!
Erin
Austin, Tx
Thank you, Erin! Glad you’ve enjoyed them as well!
Just got my micro block maker today. Plan is to germinate the seed in the micro blocks, So I can start more seeds. The next step after the seeds germinate would be to make a square wood dimple stick to match the micro block a single 3/4″ x 3/4″ x 6 to 8″ long, then use this to make a dimple in a standard plastic 72 – 1020 flats and transplant the viable germinated soil block into them (hoping to limit my space in the flat in to cell that I know will grow). the other thought was to take a 1×6 and cut notched with 1″, 2″ and 3″ spaced between 3/4″ x 3/4″ x 3/4 dimples to press into my garden direct to insert the micro block. Has anyone tried this and finally is there a receipt for soil for the micro block maker
That’s a great idea. I haven’t tried it or heard of anyone doing it, but I don’t see why it can’t work. I have nested the micro soil blocks into the 2” soil blocks so your plan should work just as well.
I have used various recipes for my soil blocks, and the ones I used are listed in this post. I’ve also used plain ProMix with nothing added (I get it at my local landscaping company) and it worked. I use the same recipes in the micro as I did in the 2” blocks… the only change you might make is to make sure you finely sift the peat moss, as it can tend to have larger pieces in it.
buy mini cupcake paper cups
let them grow ..then slit the bottom before inserting the whole thing into the ground……
cost $0.50..
time 5 secs
buy mini cupcake/muffin paper cups
let them grow ..then slit the bottom before inserting the whole thing into the ground……
cost $0.50..
time 5 secs
hi, all
Please be sure to read your seed packets, because some seeds require light to germinate, so don’t put soil on top of them after sowing!!!
Yes, you’re absolutely right. That’s one thing I love about soil blocks is that you don’t cover ANY of them with soil. And it’s so fun to watch the ones germinate that normally would remain hidden beneath the soil. 🙂
Hi Jill, I am seriously thinking about trying soil blocking. It looks like you have done different types of soil. I like the idea of pro mix. Do You feel confident in using that alone compared to the other recipes? Thanks so much for all of your hard work helping us become better gardeners!!
I did use it for two years and I was mostly pleased with the results. This year I went back to using Eliot Coleman’s soil blocking mix recipe, partly because I’m making my own potting mixes this year. But also, I was noticing that the particular Pro-Mix I was using (it had a wetting agent) seemed to develop a surface layer of mold on the blocks where I planted seeds that needed longer germination time (like peppers). For tomatoes and squash, etc., they did fine because germination happened faster and it was able to take up the moisture quicker. Overall, it’s hard to say which one is “best” because I keep going back and forth, but I’d say if you want to avoid having to source all the materials for Coleman’s mix, the half-and-half peat and potting mix blend would be my recommendation. I used Fox Farms potting soil in that one. Again, Pro-Mix worked well enough, and if you could find one without a “wetting agent” listed in the ingredients, it might work even better.
Thanks so much!! I am looking forward to the class this week!!!
In light of the cinnamon suggestion for mold treatment and prevention, has anyone tried adding cinnamon to their mix proactively? Or would this harm the roots?
I’m not aware of anyone trying this so I’m just not sure.
I tried soil blocks for the first time last year, and seed germination was mostly successful,
However, whilst root growth from the sides of the soil blocks was minimal, masses of roots from the base of the blocks intertwined and made separating the blocks difficult and damaged many seedlings.
I think this is because I am using black trays.
Is there an easy solution? Other than buying clear trays?
I’ve had that happen before and I think there were three possible reasons: (1) the blocks needed to be “potted up” or planted in the garden sooner, (2) the blocks were too close together, making it easy for the roots to “jump” from block to block at the bottom, or — more likely — (3) I was using a tray that was flat instead of corrugated. I don’t think the color mattered. I’ve noticed when I’ve used a seed starting tray with channels for water, the roots didn’t matte up at the bottom nearly as much.
Really interesting article, but I wonder if in America there is a move to use less peat in horticulture due to its negative environmental impact? In the UK peat use is being phased out, and in general recipes such at those you have included above can use coir instead of peat as the main ingredient. The water retention is of the same order as peat. I thought you might want to add that idea into your article for anybody trying to avoid both plastic and peat.
We are going in that direction, yes. I have heard mixed reviews about coco coir, so I haven’t used it yet.
isn’t use peat against earth saving techniques? I thought there was a growing movement not to use peat?
Yes, many gardeners are working to reduce their peat consumption.
I’ve just recently sown flower seeds in mini soil blocks for the first time and I’m disappointed in the overall germination rate. I didn’t use a humidity dome/plastic wrap on all of them and I’m wondering if that could be the problem? Any other thoughts?
I’ve not done flower seeds in mini soil blocks, but if they are slow to germinate, I could imagine it would be hard to keep the blocks moist enough until they sprout. Yes, I believe a humidity dome or plastic wrap could have helped. BUT, if they are flowers that take longer to germinate, the mini-blocks (3/4″) may continue to prove troublesome. I only use those for fast-sprouting seeds like beets; otherwise, I use the 2″ blocks. Still, covering is important to keep the moisture in place.
Thanks Jill! I’m going to try again using the 2” blocks.
What is your favorite tray to hold the soil blocks (2 in) for fit and ease of watering?
I use the standard 1020 tray. They fit well and I have enough room for a small watering spout on the edge.
When you say water from below what exactly do you mean? Add water to the tray and allow the roots to soak it up? Also, was there a podcast on soil blocking? I thought there was but I can not seem to find it now.
Thank you!
Hi Jennie, yes, exactly. I water the tray itself. It’s corrugated so the blocks are lifted up slightly. The podcast episode is this one, #169: https://journeywithjill.libsyn.com/169-pros-cons-of-soil-blocking-for-indoor-seed-starting
This was a great article. Explained scrotum very clearly. If you’re just starting out and want to do soil blocking what brand and size soil blockers do you recommend getting?
I bought the Ladbrooke, which is linked in the article. It’s the 2″ block size. That’s really the only one I use.
I have a question about equal parts peat and other soil. Is it equal by weight or volume?
I did it by volume, but I also estimated. It wasn’t precise.